@ Pass-by-reference


 @
 Pass-by-reference--unary                        (Special)
------------------------------------------------------------------------------
 Syntax

     @<idVar>

 Operands

     <idVar> is any valid Clipper variable identifier, other than a
     database field or an array element, to pass by reference.  Database
     fields and array elements can only be passed by value.

 Description

     The pass-by-reference operator (@) passes variables by reference to
     functions or procedures invoked with function-calling syntax.  It is a
     unary prefix operator whose operand may be any variable name.

     Passing a variable by reference means that a reference to the value of
     the argument is passed instead of a copy of the value.  The receiving
     parameter then refers to the same location in memory as the argument.
     If the called routine changes the value of the receiving parameter, it
     also changes the argument passed from the calling routine.

     Passing a variable by value means that the argument is evaluated and its
     value is copied to the receiving parameter.  Changes to a receiving
     parameter are local to the called routine and lost when the routine
     terminates.  The default method of passing arguments is by value for all
     data types including references to arrays and objects.

 Examples

     .  This example demonstrates the difference between passing a
        user-defined function argument by reference and by value:

        LOCAL nNum := 1                     // Initial values

        LOCAL aArr := { "a", "b", "c" }
        //
        CLS
        // Print initial values
        ? VALTYPE(nNum), nNum
        ? VALTYPE(aArr), aArr[1], aArr[2], aArr[3]
        //
        Udf1(nNum)                          // Pass by value (default)
        ? VALTYPE(nNum), nNum               // Result:  N, 1
        //
        Udf1(aArr[1])                       // Pass by value (default)
        ? VALTYPE(aArr), aArr[1],;
              aArr[2], aArr[3]              // Result:  A, "a" "b" "c"
        //
        Udf2(aArr)                          // Pass a reference to
        ? VALTYPE(aArr), aArr[1],;          // the array (default)
              aArr[2], aArr[3]              // A, "Oi!" "b" "c"
        //
        Udf1(@nNum)                         // Force pass by reference
        ? VALTYPE(nNum), nNum               // Result:  N, 1000
        //
        Udf3(@aArr)                         // Pass array by reference
        ? VALTYPE(aArr)                     // Result:  N
        //
        RETURN NIL

        FUNCTION Udf1(nParam)               // Receive as a local
        ? nParam                            // parameter
        nParam := 1000
        ? nParam
        RETURN NIL
        //
        FUNCTION Udf2( aParam )             // Receive as a local
        ? VALTYPE(aParam), aParam[1]        // parameter
        aParam[1] := "Oi!"
        ? aParam[1]
        RETURN NIL
        //
        FUNCTION Udf3(aParam)               // Receive as a local
        ? VALTYPE(aParam), aParam[1]        // parameter
        aParam := 1000
        ? aParam
        RETURN NIL

See Also: FUNCTION PROCEDURE

Overview of OOP

Overview of Object-Orientation

“After years of relative obscurity, object orientation appears to be entering the mainstream of commercial computing for both software developers and end users. A shift to object orientation is occurring simultaneously across a wide range of software components, including languages, user interfaces, databases, and operating systems. While object-oriented programming is no panacea, it has already demonstrated that it can help manage the growing complexity and increasing costs of software development”.


                – from Object-Oriented Software by

                               Winblad, Edwards & King

This quotation is an excellent summary of what is happening in the world of computing today. Although exciting research and development is taking place on many fronts, no single software topic currently enjoys as wide a scope or impact as object orientation. Some of the most advanced and powerful software products available today incorporate object orientation as a central concept: languages such as Smalltalk, C++, and Actor; leading edge minicomputer databases such as Ontos and Servio Logic’s Gemstone; expert system development tools such as Neuron Data’s Nexpert Object and Level 5 Object from Information Builders; and graphical user interfaces (GUIs) such as Microsoft Windows, as well as UNIX GUIs such as Open Software Foundation’s Motif, and Sun Microsystems’ Open Look.

Although object orientation applies in slightly different ways in each of the areas mentioned above, the same basic concepts are being applied in each case. Because of its broad scope, the term is often misused, especially in marketing claims; indeed, articles have been written on this subject, such as “My Cat is Object-Oriented”, by Roger King of the University of Colorado.

This abuse often arises from the fact that object orientation in user interfaces is not easy to define clearly, and it is through user interfaces that end users encounter object orientation, usually without realizing it. Some vendors assert that their products are object-oriented merely because they use screen windows – the windows are objects, the argument goes, and therefore the program is object-oriented.

This is perhaps an extreme of misrepresentation, but the situation is complicated by in-between products such as Microsoft Windows. At both the user interface and programming level, Windows is object-oriented in many ways, but in other ways falls far short of being “fully” object-oriented.

The aspect of object orientation which Class(y) addresses is that of object-oriented languages. The features required of an object-oriented language are well defined, and existing language products set something of a standard in this area. Once familiar with the principles of object-oriented languages, it becomes much easier to differentiate between true and false claims about object orientation in other areas.

One of the main driving forces for the adoption of OOP is likely to be the need to produce programs that run under graphical user interfaces such as Microsoft Windows. This means that changing from procedural to object-oriented programming may involve changing not just the language being used, but the operating environment, resulting in an extremely steep learning curve.

While GUIs promise to make life easier for the end user, they will only make it harder for the programmer, unless we are prepared to change our programming style. Writing programs with a completely object-oriented architecture simplifies development for GUIs, since the program architecture reflects the architecture of the underlying environment.

Although we cannot write Microsoft Windows applications using standard Clipper just yet, we can prepare ourselves by starting to develop object-oriented programs. This will allow us to climb the learning curve gradually, rather than suddenly being forced to learn a new programming style as well as the complexities of event driven programming in a GUI.

We’ll start our climb of the learning curve with a brief look at the history of object-oriented languages, followed by an introduction to object-oriented concepts.

Brief History of Object-Oriented Languages

The concept of an object class and inheritance, central to object-oriented languages, was first implemented in the language Simula 67, an extension of Algol 60 designed in 1967 by Ole-Johan Dahl and Kristen Nygaard from the University of Oslo and the Norwegian Computing Center (Norsk Regnesentral). Although Simula, as it is now called, is a general purpose programming language, it is not in wide usage.

A major milestone in the development of object-oriented languages was the Smalltalk research project at the Xerox Corporation’s Palo Alto Research Centre (PARC). Starting in the early 1970s, the Smalltalk project, initiated by Alan Kay, had as its goals more than just the development of a programming language; rather, a complete integrated environment was the goal, including an object-oriented language, development tools, and a graphical interface. The standard components of modern graphical user interfaces, such as windows, icons, and the mouse, were pioneered at Xerox PARC.

The Smalltalk language itself was the first ‘true’ object-oriented language in that it dealt exclusively with objects. All subsequent object-oriented languages have been based on the concepts used in Smalltalk. Smalltalk was important, not just for its language, but for the development tools available in the Smalltalk environment. These include class browsers and object inspectors. A class browser is a very powerful tool which allows program code to be edited in a much more convenient and structured way than with conventional editors. Because of the inherently well-defined structure of object-oriented programs, the class browser is capable of displaying a given program’s class hierarchy in graphical form, allowing the user to ‘point and shoot’ to select a particular method (procedure) to be edited. Many programming tasks become menu driven, such as the creation of new classes, modifying the structure of the inheritance tree, and modifying the structure of a class. These operations are more complex and tedious when performed in a traditional editing environment.

Tools such as these are an integral part of the promise of object-oriented technology. They can simplify a programmer’s life, reducing development time and costs. Although they are a rarity in the DOS world at present, as the move toward object-oriented technology grows, and as we move towards GUIs like Microsoft Windows, these tools will become more commonplace.

What is an Object?

One of the fundamental reasons that object orientation is enjoying such success as a programming paradigm is very simple: the real world is made up of objects. An invoice is an object. A stock item is an object. A balance sheet is an object. An entire company is an object. Objects can contain other objects (this is called composition); and in this way complete systems can be constructed using objects.

But what is an object from a programming point of view? Simply put, it is a collection of related data, which is associated with the procedures which can operate on that data.

By this definition, most well-structured programs could be said to contain objects. This is another contributing factor to the confusion surrounding the definition of object orientation.

It is in fact possible to write programs in an object-oriented way in many traditional procedure-oriented languages. However, without the support provided by an object orientated languages, many compromises have to be made.

An object-oriented language formalizes the relationship of the data within an object to the program code which can operate on that data, by requiring that the compiler or interpreter be informed which procedures are allowed to operate on an object’s data.

Before we can clarify our definition of an object further, we need to explore a few other concepts.

Classes, Instances and Instance Variables

In any given system, many objects will exist. Many of these objects will be very similar to each other: for example, you might have thousands of invoice objects stored on disk. Although each one is different, they all share a common set of attributes. The same operations are valid on all of them. There is a term to describe such a collection of similar objects: it is called a class.

A class can be thought of as a template, or specification, for creating an object. The class itself consists of details specifying what the structure of its objects should be. The class can also be said to ‘contain’ the program procedures which are permitted to operate on objects of that class.

For example, an Invoice class would contain procedures for printing and updating invoices. It would also contain details of the structure of an invoice object, for example that each invoice object must contain variables named date, customer, amount, etc.

To look at it another way, we can define an object as an instance of a class. A given class may have many instances of itself (objects) in existence at any one time. Each of these instances has a structure determined by the class to which it belongs, but they are distinguished from each other by the data within that structure, which is stored in instance variables. The term instance variable distinguishes a variable that belongs to an object class from the ordinary stand-alone variables that we are used to. Instance variables are contained within objects, and are not directly accessible outside of those objects, although they can be accessed by sending messages to their objects.

Messages and Methods

Earlier, an object was defined as a module containing both procedures and data. An object’s procedures are known as methods. This terminology helps to distinguish them from procedures which are not associated with an object, since there are fundamental differences. In a fully object-oriented system such as Smalltalk, there are no procedures, only methods. In a hybrid system such as C++, or Clipper with Class(y), both methods and procedures can coexist.

Methods are not called in the same way that procedures are. Rather, messages are sent to objects, which respond by executing the appropriate method. All valid operations on or using the data in an object are defined by its methods, so all operations on an object are accomplished by sending messages to the object. Because of this, it is not necessary for other objects to access, or even know about, the internals of foreign objects. Objects behave like black boxes: send them a message, and they respond by executing the appropriate method. Send the print message to an invoice object, and it will respond by printing itself. This black box approach is known generally as encapsulation, and while it is possible to achieve in procedural systems, object-oriented systems actively encourage, support and enforce it.

Inheritance – Superclasses and Subclasses

Common properties among groups of classes can often be combined to form a parent class, or superclass. For example, it might make sense for a Quotation class, an Order class, and an Invoice class to all share the same superclass, a Sales Document class. The Quotation, Order, and Invoice classes are thus subclasses of the Sales Document class. This is known as inheritance. The subclasses inherit all the properties of their superclass, and may add unique, individual properties of their own. This concept can be extended further, with subclasses of subclasses. Such class hierarchies are a common feature of object-oriented systems.

Inheritance is one of the most powerful features of object-oriented programming, since it allows reuse of existing code in new situations without modification. When a subclass is derived from a superclass, only the differences in behavior need to be programmed into the subclass. The superclass remains intact and will usually continue to be used as is in other parts of the system, while other subclasses are using it in different ways.

Polymorphism

The term polymorphism in this context refers to the fact that the same message, such as print, can result in different behaviors when sent to different objects. Sending the print message to a graph object has a different effect than it would on a balance sheet object. With a traditional procedural approach, the programmer is forced to differentiate procedure names, using names like PrnBalSheet and PrintGraph. In an object-oriented language, this differentiation is unnecessary, and in fact unwise.

Polymorphism has benefits for the programmer in that the same name can be used for conceptually similar operations in different classes, but its implications go deeper than that. It means that a message can be sent to an object whose class is not known. In a procedural system, given a variable of unknown type, a CASE statement would typically be required to test the type of the variable and pass it to the correct procedure for the desired operation. In an object-oriented system, a message is sent to the object with no testing, and the object responds accordingly.

This has important implications for inheritance, since it means that methods belonging to classes near the root of the inheritance tree do not need to know details of the subclasses which may be inherited from them. By sending messages with standardized names to the objects with which it deals, generic methods can be written which can later be used with any class which supports the required messages.

Anton van Straaten


 This article borrowed from manual of famous Clipper 3tdh party Library : CLASS(Y)

 http://www.the-oasis.net/ftpmaster.php3?content=ftplib.htm

Quick Start to Migration

Chapter I – Text to text conversion

In Clipper world, “migration” means “convert a DOS based Clipper program to Windows”. This is a dream of every Clipper – DOS programmer.

 Before all, we need clarify some terms:

May be found multiple ways for convert a DOS based Clipper program to Windows. In general, DOS programs are runs in “text” mode and Windows program runs in “Graphic” mode; and this is what meant by term “migration”.

Converting a text mode program to directly GUI (Graphical User Interface) is a painful job. First, we need to find a Compiler with GUI support, or a GUI library usable with a specific compiler. If we have more than one opportunity ( yes, it is so ) we need make a choice between them.

For make a right selection we need learn, understand specialties of each option and differences between them.

Believe me, this is an endless way 😦

Instead, let’s begin with simpler thing: convert a DOS text mode program to Windows text mode program.

Question: Without GUI, what meaning will be to migrate from DOS to Windows?

Answer: Good question and like all good question, answer isn’t easy.

First, modern OSs moves away day to day from DOS conditions; memory problems, screen problems, codepage problems, etc… By the time, building / running 16 bit executable becomes more difficult day to day.

Whereas Harbour already is a 32 / 64 bit compiler.

Second, all DOS Compilers for Clipper are commercial and registration required products; furthermore they are almost out of sold for this days; what compiler you could use?

And third, Harbour is best free compiler and the best way to use a free GUI tool for xBase language.

So, beginning with using Harbour in text mode is the best start point, I think.

First step is downloading and install HMG or Harbour. If you didn’t past this step yet please refer previous articles in this section or “Links” page of this blog.

The easiest way for using Harbour compiler is calling hbmk2, the wonderful project maker for Harbour compiler.

Depending your installation, hbmk2 may be in different locations; such as C:\Harbour\bin or c:\hmg\harbour\bin or anything else.

Hereafter I will assume that your hbmk2 is in C:\hmg\Harbour\bin. If your installation is different, please modify above examples.

Second step is assign an empty folder (directory) for work / test affairs; say C:\test.

And the third step is copying your Clipper program(s) to this folder.

But don’t rush; we have some precautions:

– Better way is starting with a single-program project; if you haven’t written a new one. Don’t uses for now projects have multiple program file.

 – Your program may have some “national” characters and these characters may be differently shown between DOS and Windows. If so, you may want fix manually these differences via a Windows based text editor. Or use a program if you have one. Harbour has a clever tool (HB_OEMTOANSI() function) is usable for this purpose.

 – In Clipper it’s possible a program file without module (procedure / function) definition. If you have such file(s), enclose your code with PROCEDURE — RETURN statement pair.

– Every Harbour project must have one and only one MAIN module (procedure / function). The first procedure / function in your single program file will be considered as MAIN module of your project. (In HMG, name of this module must be “main” also).

– Almost all Clipper commands, statement, functions, pseudo functions, manifest constants etc are usable almost in the same ways with Clipper. May be exist some very few and very rare differences, and of course solving methods for its.

For compile process we will use command box (DOS / console window) of Windows. You can open a console window, with the menu Start -> Run -> cmd or selecting it in the “Command Prompt” from the Start Menu \ All Programs.

 – “Command / console window” size may not appropriate for easy use. You may

      – use a MODE ( DOS ) command :

         MODE CON LINES=54 COLS=148

       or

   – adding a SetMode() statement at the beginning of MAIN module of your project. For example:

       SetMode( 25,  80 )  // 25 line 80 column same as standard 
                           // DOS screen ( but not full screen ! )
       SetMode( 48, 128 )  // 48 line 128 column, may be more readable

Now, we are ready to begin: Enter this command in console window :

 C:\hmg\harbour\bin hbmk2 <mainPrgName>

You don’t need any SET command (such as PATH etc) before this command; hbmk2 will find all necessary paths / files.

For running executable after compile, add a -run switch to the command line :

 C:\hmg\harbour\bin hbmk2 <mainPrgName> -run

Of course, you need supply name of your main .prg file in place of <mainPrgName>.

Note that you don’t need a separate “linking” step; hbmk2 will do everything for you.

You may use this

 C:\hmg\harbour\bin hbmk2 <mainPrgName>

command via a batch ( .bat ) command file (such as “build.bat”) too. In this way you can apply compiling process without console window; run .bat file by double click in the Windows Explorer. In this case you may need add a PAUSE command at end of .bat file.

That’s all.

You know, a program file may contains more than one module (procedure / function). So you may develop your project by adding new modules to your single program file.

In this step you don’t need trying extra features, extensions of Harbour. Before that adventure your primary need is to convert existing project Clipper to Harbour.

When you reach a level of multiple-program file project:

– Basic rules are the same: the first module in the your program file is MAIN module of your project.

If your .prg files contains:

  SET PROCEDURE TO <procedure_File_Name>

 and / or

   #include <procedure_File_Name>

 you may or may not continue using these statement.

 – The shortest way for compiling a multiple-file project is use a .hbp ( Harbour Projet ) file. This is a text file and its simplest form is a file contains list of your .prg files. For example:

myprog01.prg
myprog02.prg
myprog03.prg
myprog04.prg

and the compile command is the same :

  C:\hmg\harbour\bin hbmk2 <mainProjectFileName>

In this case you don’t need to use SET PROC… and #include … statement and this is the better way.

Because hbmk2 applies “incremental” compiling, that is compiles only modified files.

Under normal circumstances, any module in any program file is callable in anywhere in the project. If you have some modules that exclusive to this program file, you may use STATIC keyword at the beginning of PROCEDURE / FUNCTION statement. For example:

STATIC FUNCTION OpenTable()

With this syntax you will prevent calling this module outside of this .prg file and the possibility of using this module name into other .prg files.

Example :

Take “A typical Harbour Program” in the “Harbour Sample” page.

As seen at .pdf file by given link, this sample program borrowed from official reference guide of a Clipper compiler. That is, in fact this is a Clipper program and it will may compile with Harbour and run without any modification.

Let’s try.

– Copy and paste this sample and save in your PC with a name say “typical.prg”.

– Comment out the line for now.

 #include "Database.prg" // Contains generic database functions

– Call hbmk2:

 C:\hmg\harbour\bin hbmk2 typical -run

 Note: While working / playing on programs, you may encounter some error messages like:

  Error F0029  Can't open #include file xxx
  Error E0002  Redefinition of procedure or function xxx
  Error: Referenced, missing, but unknown function(s): xxx
  undefined reference to HB_FUN_xxx

 Please don’t panic !

    “Error” is salt and pepper of programming play ! 😉

 The worst situation isn’t getting error, but is unable to stay !

   The “HB_FUN_xxx” may be seen weird at first meet. The “HB_FUN_” is a prefix given by system ( compiler ) to your function; so you need search erroneous point into tour program files without this prefix.

Now, let’s continue to our “typical” program:

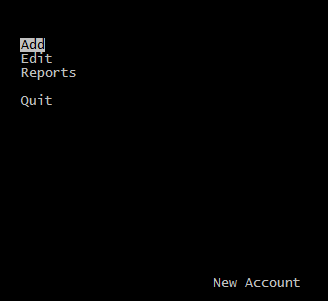
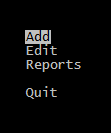
If you compile the program with commented out #include … line, possibly it will work, by opening main menu:

Typical_1

But what’s that?

When selected a menu item (except “Quit”) we can’t see other than an empty screen!

Again, don’t panic!

This situation too is not very rare !

If you use vertical scroll bar of command / console window, you will notice that your screen is considerably much longer than seen !

To avoid this conflict, ( as stated above ) we need use a SetMode() function call at top of our Main() procedure ( but AFTER LOCAL statement ! ) :

  SetMode( 24, 79 )

 And now everything is OK.

Typical_2

In fact, not really everything, we have a few “fine adjustment”.

Cut and paste the section after “// Database.prg” to a separate “Database.prg” file, un-comment the “#include …” line and then re-compile.

In this case we have a “multiple prg” project. As stated earlier, better way is using a .hbp file instead of “#include …” statements.

Now comment out ( or delete now ) the #include line.

Build a new text file with name “typical.hbp” and with this content :

Typical.prg
DataBase.prg

And recall hbmk2 without any modification :

C:\hmg\harbour\bin hbmk2 typical -run

That’s all !

Congratulations !

Now you have a multiple-prg project  !

Hash Basics

Definition:

In general, a Hash Table, or Hash Array, or Associative array, or shortly Hash is an array- like data structure, to store some data with an associated key for each; so, ‘atom’ of a hash is a pair of a ‘key’ with a ‘value’. A hash system needs to perform at least three operations:

–      add a new pair,

–      access to value via key

–      the search and delete operations on a key pair

In Harbour, a hash is simply a special array, or more precisely a “keyed” array with special syntax with a set of functions.

Building:

The “=>” operator can be used to indicate literally the relation between <key> <value> pair: <key> => <value>

 We can define and initialize a hash by this “literal” way :

 hDigits_1 := { 1 => 1, 2  => 2, 3  => 3, 4  => 4 }

 or by a special function call:

 hDigits_1 := HB_HASH( 1, 1, 2, 2, 3, 3, 4, 4 )

 Using “add” method may be another way :

hDigits_1 := { => } // Build an empty hash
hDigits_1[ 1] := 1

hDigits_1[ 2] := 2

hDigits_1[ 3] := 3

hDigits_1[ 4] := 4

In this method while evaluating each of above assignments, if given key exits in hash, will be replaced its value; else add a new pair to the hash.

In addition, data can be added to a hash by extended “+=” operator:

   hCountries := { 'Argentina' => "Buenos Aires" }
   hCountries += { 'Brasil'    => "Brasilia" }
   hCountries += { 'Chile'     => "Santiago" }
   hCountries += { 'Mexico'    => "Mexico City" }

Hashs may add ( concatenate ) each other by extended “+” sign :

   hFruits := { "fruits" => { "apple", "chery", "apricot" } }
   hDays   := { "days"   => { "sunday", "monday" } } 
   hDoris := hFruits + hDays

Note:  This “+” and “+=” operators depends xHB lib and needs to xHB lib and xHB.ch.

Typing :

<key> part of a hash may be any legal scalar type : C, D, L, N; and <value> part may be in addition scalar types, any complex type ( array or hash ).

Correction : This definition is wrong ! The correct is :

<key> entry key; can be of type: number, date, datetime, string, pointer.

Corrected at : 2015.12.08; thanks to Marek.

hDigits_2 := {  1  => “One”,  2  => “Two”,  3  => “Three”,  4  => “Four” }

hDigits_3 := { "1" => "One", "2" => "Two", "3" => "Three", "4" => "Four" }
hDigits_4 := { "1" => "One",  2  => "Two",  3  => "Three", "4" => "Four" }
hDigits_5 := {  1  => "One",  1  => "Two",  3  => "Three",  4  => "Four"

All of these examples are legal. As a result, a pair record of a hash may be:

–      Numeric key, numeric value ( hDigits_1 )

–      Numeric key, character value ( hDigits_2 )

–      Character key, character value ( hDigits_3 )

–      Mixed type key ( hDigits_4 )

Duplicate keys (as seen in hDigits_5) is permitted to assign, but not give a result such as double keyed values: LEN( hDigits_5 ) is 3, not 4; because first pair replaced by second due to has same key.

Consider a table-like data for customers records with two character fields: Customer ID and customer name:

Cust_ID Cust_Name
CC001 Pierce Firth
CC002 Stellan Taylor
CC003 Chris Cherry
CC004 Amanda Baranski

We can build a hash with this data :

  hCustomers := { "CC001" => "Pierce Firth",;
 "CC002" => "Stellan Taylor",;
 "CC003" => "Chris Cherry",;
 "CC004" => "Amanda Baranski" }

and list it:

   ?
   ? "Listing a hash :"
   ?
   h1Record := NIL
   FOR EACH h1Record IN hCustomers
      ? cLMarj, h1Record:__ENUMKEY(), h1Record:__ENUMVALUE()
   NEXT

 Accessing a specific record is easy :

 hCustomers[ "CC003" ] // Chris Cherry
*-._.-._.-._.-._.-._.-._.-._.-._.-._.-._.-._.-._.-._.-._.-._.-._.-._.-._.-._.-._.-._.-._.-._.-._.-._.
/*
Hash Basics

*/
#include "xhb.ch"
#define NTrim( n ) LTRIM( STR( n ) )
PROCEDURE Main()
 SET DATE GERM
 SET CENT ON
 SET COLO TO "W/B"

 cLMarj := SPACE( 3 )

 CLS

 hDigits_1 := { => } // Build an empty hash

 hDigits_1[ 1 ] := 1
 hDigits_1[ 2 ] := 2
 hDigits_1[ 3 ] := 3
 hDigits_1[ 4 ] := 4

 ListHash( hDigits_1, "Digits_1" )

 hDigits_2 := HB_HASH( 1, 1, 2, 2, 3, 3, 4, 4 )

 ListHash( hDigits_2, "Digits_2" )

 hDigits_3 := { 1 => 1,;
 2 => 2,;
 3 => 3,;
 4 => 4 }
 ListHash( hDigits_3, "Digits_3" )

 hDigits_4 := { 1 => "One",;
 2 => "Two",;
 3 => "Three",;
 4 => "Four" }
ListHash( hDigits_4, "Digits_4" )

 hDigits_5 := { "1" => "One",;
 "2" => "Two",;
 "3" => "Three",;
 "4" => "Four" }
 ListHash( hDigits_5, "Digits_5" )

 hDigits_6 := { "1" => "One",;
 2 => "Two",;
 3 => "Three",;
 "4" => "Four" }
 ListHash( hDigits_6, "Digits_6" )

 hDigits_7 := { 1 => "One",;
 1 => "Two",; // This line replace to previous due to same key 
 3 => "Three",;
 4 => "Four" }
 ListHash( hDigits_7, "Digits_7" )

 * WAIT "EOF digits"

 hCustomers := { "CC001" => "Pierce Firth",;
 "CC002" => "Stellan Taylor",;
 "CC003" => "Chris Cherry",;
 "CC004" => "Amanda Baranski" }
 ListHash( hCustomers, "A hash defined and initialized literally" )
 ?
 ? "Hash value with a specific key (CC003) :", hCustomers[ "CC003" ] // Chris Cherry
 ?
 cKey := "CC003" 
 ?
 ? "Locating a specific record in an hash by key (", cKey, ":"
 ?
 c1Data := hCustomers[ cKey ]
 ? cLMarj, c1Data

 hCountries := { 'Argentina' => "Buenos Aires" }
 hCountries += { 'Brasil' => "Brasilia" }
 hCountries += { 'Chile' => "Santiago" }
 hCountries += { 'Mexico' => "Mexico City" }

 ListHash( hCountries, "A hash defined and initialized by adding with '+=' operator:" )

 hFruits := { "fruits" => { "apple", "chery", "apricot" } }
 hDays := { "days" => { "sunday", "monday" } } 

 hDoris := hFruits + hDays

 ListHash( hDoris, "A hash defined and initialized by concataned two hash with '+' operator:" )

 ?
 @ MAXROW(), 0
 WAIT "EOF HashBasics.prg"

RETURN // HashBasics.Main()
*-._.-._.-._.-._.-._.-._.-._.-._.-._.-._.-._.-._.-._.-._.-._.-._.-._.-._.-._.-._.-._.-._.-._.-._.-._.
PROCEDURE ListHash( hHash, cComment )

 LOCAL x1Pair := NIL

 cComment := IF( HB_ISNIL( cComment ), '', cComment )

 ? 
 ? cComment, "-- Type :", VALTYPE( hHash ), "size:", NTrim ( LEN( hHash ) ) 
 ?
 FOR EACH x1Pair IN hHash
    nIndex := x1Pair:__ENUMINDEX()
    x1Key := x1Pair:__ENUMKEY()
    x1Value := x1Pair:__ENUMVALUE()
    ? cLMarj, NTrim( nIndex ) 
*   ?? '', VALTYPE( x1Pair )
    ?? '', x1Key, "=>"
*   ?? '', VALTYPE( x1Key ) 
*   ?? VALTYPE( x1Value ) 
    IF HB_ISARRAY( x1Value ) 
       AEVAL( x1Value, { | x1 | QQOUT( '', x1 ) } )
    ELSE 
       ?? '', x1Value
    ENDIF 
 NEXT

RETURN // ListHash()
*-._.-._.-._.-._.-._.-._.-._.-._.-._.-._.-._.-._.-._.-._.-._.-._.-._.-._.-._.-._.-._.-._.-._.-._.-._.

HashBass

Using code blocks, again

Using code blocks again (.pdf)

The Clipper conversion process

The Clipper conversion process (.pdf)

Design of Clipper

build the truly reusable routine

Basic Controls – 2


( Text Box  )

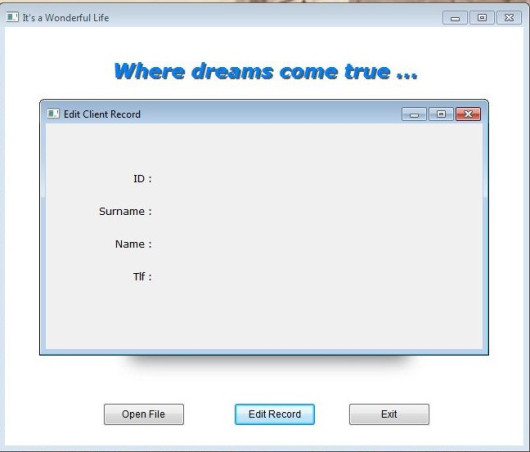
We are continuing with Viva_HMG.hbp, Main.prg and Main.fmg. We have assign real actions other than MsgBox() to our two buttons now : Open File and Edit Record. Open File not required GUI controls ( at least for now ), so we can begin with it: For Open File we need a file ( a table ) first: it’s here; a table with four field: Clients.dbf :

No:  Field Name Type Width Dec
---  ---------  ---- ----- ---
  1  CLI_ID       N      5   0
  2  CLI_SNAM     C     12   0
  3  CLI_NAME     C     12   0
  4  CLI_TLF      C     11   0

And then add a little routine to Main.prg for open (USE) it:

PROCEDURE OpenTable()
   IF FILE( "CLIENTS.DBF" )
      USE CLIENTS
   ELSE
      MsgStop( "Clients.dbf file not found !")
   ENDIF
RETURN // OpenTable()

And assign this procedure to ACTION of  Open File  button.

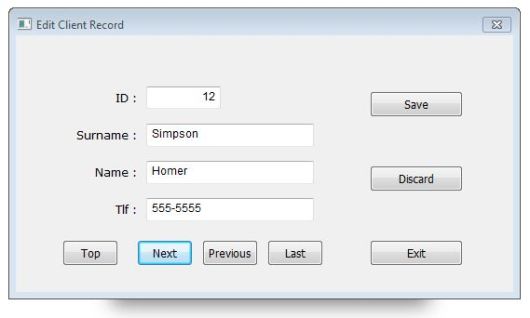
Now, we can begin Edit Record task. For this task we need a separate form, a sub form.  Then let’s begin. “New form” from tool-bar and assign a name : EditReco. Assign a title : “Edit Record”, a type : MODAL. Our table has four fields, so we need four LABEL first:

Names :  lblCLI_ID,  lblCLI_SNAM,  lblCLI_NAME, lblCLI_TLF;

Values ( Captions ) : ID,  Surname, Name, Tlf

Rows : 60, 100, 140, 180 Col : 60

Cols :  60, 60, 60, 60

Widths : 70, 70,  70, 70

Alignement : RIGHT, RIGHT, RIGHT, RIGHT

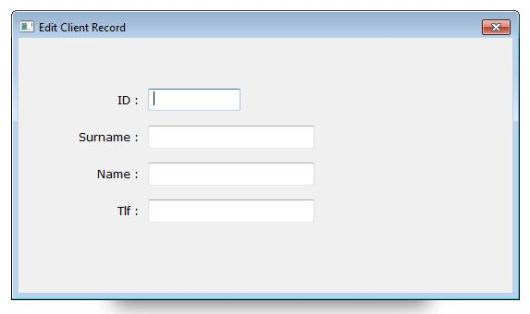
We can see our job at work:

Now we need a place  for display the current data and accept user input. The control for this purpose is text box. So we need to define four text boxes for each field in the table.

The button of text box in the IDE tool bar is :

Names :  txbCLI_ID,  txbCLI_SNAM,  txbCLI_NAME, txbCLI_TLF;

Rows : 55, 95, 135, 175

Col : 140

DataTypes : First : NUMERIC, others : CHARACTER

We can see our job at work:

Well …

But where are table data ?

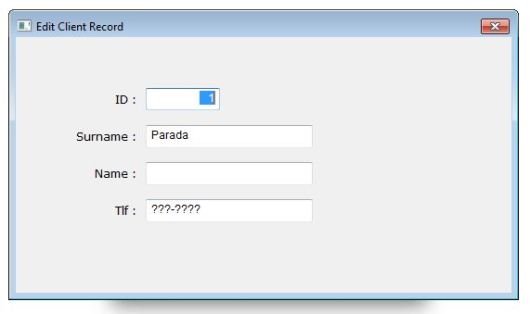
To see table data we need assign field values to text boxes as values.

Again, a little procedure:

PROCEDURE ReadData()
   EditReco.txbCLI_ID.Value   := CLIENTS->CLI_ID
   EditReco.txbCLI_SNAM.Value := CLIENTS->CLI_SNAM
   EditReco.txbCLI_NAME.Value := CLIENTS->CLI_NAME
   EditReco.txbCLI_TLF.Value  := CLIENTS->CLI_TLF
RETURN // ReadData()

and a call command for this procedure to ON INIT event of  EditReco form.

The result :

Everything is OK ?

No !

This is only first record of table; how we will see others ?

Yes, we need now yet another feature: navigation; that is travelling between records of table.

But before navigation, we have a problem: Open Table must be processed before Edit Record.

Otherwise a run time error will occurs: Alias does not exist. 

What we can do?

–       Discard Open Table button, open the table automatically; at beginning of program or at beginning of editing.

–       Before editing, check the table, if doesn’t open,

–          a)  open automatically or

–          b)  warn user and don’t load Edit Table form.

Probably most convenient is : disable Edit Record button until table is open.

First a mini procedure :

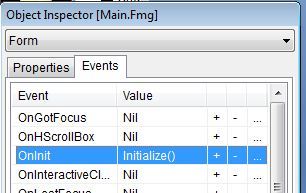
PROCEDURE Initialize()
   Main.btnEditRec.Enabled := .F.
RETURN // Initialize()

And then add this procedure ON INIT event of form main:

Last point: enable it after USE table:

PROCEDURE OpenTable()
   IF FILE( "CLIENTS.DBF" )
      USE CLIENTS
      Main.btnEditRec.Enabled := .T.
   ELSE
      MsgStop( "Clients.dbf file not found !")
   ENDIF
RETURN // OpenTable()

Run and see:

Before Open File :

After Open File:

Now we can pass to navigation:

We need seven buttons: Go Top, Go Next, Go Previous, Go Last, Save, Discard, Exit.

Name: btnGoTop, Caption : Top,  Col : 50, Row: 220, Height: 28, Width: 60

Name: btnGoNext, Caption : Next,  Col : 130, Row: 220, Height: 28, Width: 60

Name: btnPrevious, Caption : Previous,  Col : 200, Row: 220, Height: 28, Width: 60

Name: btnGoLast, Caption : Last,  Col : 270, Row: 220, Height: 28, Width: 60

Name: btnSave Caption : Save,  Col : 380, Row: 60, Height: 28, Width: 100

Name: btnDiscard, Caption : Discard,  Col : 380, Row: 140, Height: 28, Width: 100

Name: btnExit, Caption : Exit,  Col : 380, Row: 220, Height: 28, Width: 100

Common: Font Name: Tahoma, Font Size: 9

Actions :

btnGoTop: ( DBGOTOP(), ReadData() )
btnGoNext: ( DBSKIP(), ReadData() )
btnPrevious: ( DBSKIP( -1 ), ReadData() )
btnGoLast: ( DBGOBOTTOM(), ReadData() )
btnSave: SaveData()
btnDiscard: ReadData()

btnExit: ThisWindow.Release

Note that actions of four first buttons include two actions, separated by comma and enclosed by parenthesis.  With this notation we can define more than one action together.

SaveData() is the inverse of  ReadData(): copy values of text boxes to table fields.

PROCEDURE SaveData()         // Save data from text boxes to table
   CLIENTS->CLI_ID   := EditReco.txbCLI_ID.Value
   CLIENTS->CLI_SNAM := EditReco.txbCLI_SNAM.Value
   CLIENTS->CLI_NAME := EditReco.txbCLI_NAME.Value
   CLIENTS->CLI_TLF  := EditReco.txbCLI_TLF.Value
RETURN // SaveData()

Discard is simply re-reading data from table.

The result:

To be continued …

Download source files

The Art Of Simplicity

A discussion of how to create objects with Clipper using arrays, and ordinary Clipper syntax. Has several good examples.

An Introduction into Object Oriented Programming.

To me, the challenge of programming is in finding a simple clean way to implement a program. Making sure no matter how complex the specs are, the code itself stays small, strait forward, and easy to maintain.

To illustrate how to reduce the complexity of things, lets examine the box drawing routines. Normally to display a nondestructive box on the screen you write something like this:

 old_row:=row()
 old_col:=col()
 old_cursor:=setcursor()
 old_screen:=savescreen(10, 20, 16, 59)
 old_color:=setcolor("w+/n, w+/r")
 @ 10, 20, 16, 59 BOX 'ÚÄ¿³ÙÄÀ³ '

Then when you are done and wish to remove the box, you reverse the procedure:

 restscreen(10,20,16,59,old_screen)
 setcolor(old_color)
 setcursor(old_cursor)
 setpos(old_row,old_col)

This scheme results in using 9 lines of code, 5 memory variables, and requires that the programmer maintain the box coordinates in 3 different places. After going through this procedure a few times I started wondering if there was a better way of doing this.

When I tried to solve this problem, I had several false starts. I created a procedure to display the box that saved all the variables to statics, and the next time it was called it would restore the box. That didn’t work too well since I often wanted more than a single box on the screen.

Then I tried saving the memvars to an array that I used like a stack. But that didn’t work out too well either, since it required that all boxes be removed in the same order that they were created.

Then I decided that all the memvars being used to store the box information belonged in the calling routine, where they had been all along. Despite the fact that this seemed to bring me back to square one I continued with this train of thought.

If I stored all the memvars being used by the box routine in an array, then all the memvars could be stored in a single package, and passed to the calling routine without complications:

aBox := CreateBox(10, 20, 16, 59, "w+/n, w+/r")

And when I no longer needed the box and wished to restore the original screen:

DestroyBox( aBox )

Please compile DEMO1, to see the basic box functions.

CreateBox() and DestroyBox() are used to replace 10 lines of code, and the array aBox was used to replace 5 variables. Putting all the data into the array aBox and handling only the array, makes things much simpler.

Now that we have developed this technique, we could theoretically create a number functions that work together, like CreateBox() and DestroyBox(), and use the data contained in aBox. And in the file BOX.PRG, I have a group of sample functions that do just that:

 CreateBox()
 DestroyBox()
 BoldBox()
 MoveBox()

Another benefit of this technique, is that we can have multiple arrays that each correspond to separate boxes, and use them all at the same time.

For example, we could write a program with a couple of boxes:

 aBox1 := CreateBox( 05,  26,  20,  53,  "w+/n, w+/n" )
 aBox2 := CreateBox( 10,  20,  16,  59,  "w+/b, w+/b" )

To move the second box:

MoveBox( aBox2,  -08,  -18 )

Then we could give the second box a highlight:

BoldBox( aBox2, "w+/b, w+/b" )

Then to remove both boxes:

 DestroyBox(aBox2)
 DestroyBox(aBox1)

This example does some fairly complex things, and it does so, in only six lines of code. To run this example, compile the file DEMO2.PRG.

This programming technique has a name, it is called Object Oriented Programing (OOP).

According to OOP terminology the arrays aBox1 and aBox2 are objects, and the functions CreateBox, MoveBox, BoldBox, and DestroyBox are methods.

Objects are collections of related data, or in dBase terminology, arrays of related memvars. In our example, aBox1 and aBox2 are qualify as objects since they contain related data (the coordinates of the box, the original color, cursor position, cursor status, etc.).

In object oriented programming, several instances of an object can be created, and later destroyed when we are finished with them. In our example, aBox1 and aBox2, constitute two separate instances of box objects.

If you look at the example in DEMO3.PRG, you will see that the program creates an array of four box objects, and four separate instances of the box object are on the screen at once.

A methods is a special type of function. Methods are functions that are grouped together, and manipulate the same data objects. In the file BOX.PRG, you will see the code for four methods that use the box objects ( CreateBox, DestroyBox, BoldBox, MoveBox )

CreateBox is a special type of method called a constructor, because it creates a box object and initializes it.

DestroyBox is a special type of method called a destructor, because it destroys a box object and frees of the memory that the box object used.

Every time we call a method / function, we pass it the object we want the method to manipulate. In our example, we have two objects, aBox1 and aBox2. To move the first box, we called the method MoveBox() like this:

MoveBox( aBox1, 1, 1 )

And to bold the second box, we called the method BoldBox() like this:

BoldBox( aBox2, "w+/b,w+/n" )

The constructor CreateBox doesn’t need to be passed the object, because the constructor creates the object.

Now that you understand what an object is, you can create additional functions / methods that use the box object. And hopefully go on to create your own objects and methods.

Cynthia Allingham, 1991

/***
*
* BOX.PRG
*
* Written By: Cynthia Allingham 11/01/91
* Purpose: Displays exploding box on the screen
* Returns: Previous screen contents
*/
FUNC CreateBox (nTop, nLeft, nBottom, nRight, box_color)
local save_window:=savescreen(nTop, nLeft, nBottom, nRight)
local save_color:=setcolor(box_color)
local save_cursor:=setcursor()
local save_row:=row()
local save_column:=col()
@ nTop,nLeft,nBottom,nRight BOX 'ÚÄ¿³ÙÄÀ³ '
RETURN {nTop, nLeft, nBottom, nRight, save_window,;
 save_color, save_cursor, save_row, save_column}
/***
* Written By: Cynthia Allingham 11/01/91
* Purpose: destroys the box and restores old settings
*/
FUNC DestroyBox (aList)
restscreen(aList[1],aList[2],aList[3],aList[4],aList[5])
setcolor(aList[6])
setcursor(aList[7])
setpos(aList[8],aList[9])
aList:=nil
return nil
/***
* Written By: Cynthia Allingham 11/01/91
* Purpose: Changes the box border
*/
FUNC BoldBox (aList, cColor)
@ aList[1],aList[2],aList[3],aList[4];
 BOX 'ÛßÛÛÛÜÛÛ' color cColor
return nil
/***
* Written By: Cynthia Allingham 11/01/91
* Purpose: Redimensions the screen
*/
FUNC MoveBox (aList, nVert, nHorz)
local save_window:=savescreen(aList[1],aList[2],aList[3],aList[4])
dispbegin()
restscreen(aList[1],aList[2],aList[3],aList[4],aList[5])
aList[3] += nVert; aList[1]+=nVert
aList[4] += nHorz; aList[2]+=nHorz
aList[5]:=savescreen(aList[1],aList[2],aList[3],aList[4])
restscreen(aList[1],aList[2],aList[3],aList[4],save_window)
dispend()
return nil
* EOF BOX.PRG
/***
*
* DEMO1.PRG
*
* Written By: Cynthia Allingham 11/01/91
* Purpose: Simple program demonstrating the creation and
* destruction of a box object.
*/
local aBox
set procedure to box
@ 00,00,24,79 box 'ÚÄ¿³ÙÄÀ³°'
aBox:=CreateBox(10, 20, 16, 59, "w+/n, w+/r")
@22,19 say padc("Press any key to destroy the box",40)
inkey(10)
DestroyBox(aBox)
* EOF DEMO1.PRG
/***
*
* DEMO2.PRG
*
* Written By: Cynthia Allingham 11/01/91
* Purpose: Demonstates the use of two box objects
*/
local aBox1, aBox2
set procedure to box
@ 00,00,24,79 box 'ÚÄ¿³ÙÄÀ³°'
aBox1:=CreateBox(05, 26, 20, 53, "w+/n, w+/n")
message("Press any key to create a second box")
aBox2:=CreateBox(10, 20, 16, 59, "w+/b, w+/b")
message("Press any key to move the second box")
MoveBox(aBox2, -08, -18)
message ("Press any key to bold the second box")
BoldBox(aBox2, "w+/b, w+/b")
message("Press any key to destroy both boxes")
DestroyBox(aBox2)
DestroyBox(aBox1)
func message(ctext)
@22,19 say padc(ctext,40)
inkey(10)
* EOF DEMO2.PRG
/***
*
* DEMO3.PRG
*
* Written By: Cynthia Allingham 11/01/91
* Purpose: Demonstates the use of four box objects
*/
local aBox[4]
local cnt
set procedure to box
@ 00,00,24,79 box 'ÚÄ¿³ÙÄÀ³°'
aBox[1]:=CreateBox(05, 05, 09, 30, "w+/n, w+/n")
@ 06, 07 say "box #1"
aBox[2]:=CreateBox(18, 03, 22, 14, "w+/b, w+/b")
@ 20, 05 say "box #2"
aBox[3]:=CreateBox(20, 48, 22, 77, "w+/r, w+/r")
@ 21, 50 say "box #3"
aBox[4]:=CreateBox(02, 64, 12, 75, "w+/gr, w+/gr")
@ 03, 66 say "box #4"
for cnt:=1 to 12
 inkey(0.5)
 MoveBox(aBox[1], +1, 0)
 MoveBox(aBox[2], 0,+4)
 MoveBox(aBox[3], -1, 0)
 MoveBox(aBox[4], 0,-4)
next
inkey(10)
for cnt:=1 to 4
 DestroyBox(aBox[cnt])
next
* EOF DEMO3.PRG
C5 Flow Control Commands, Statements and Funtions

Commands :

CALL* :

Execute a C or Assembler procedure

CALL <idProcedure> [WITH <exp list>]

CANCEL* :

Terminate program processing

CANCEL* | QUIT

DO* :

Call a procedure

DO <idProcedure> [WITH <argument list>]

QUIT

Terminate program processing

QUIT | CANCEL*

RUN :

Execute a DOS command or program

RUN | !* <xcCommandLine>

SET KEY :

Assign a procedure invocation to a key

SET KEY <nInkeyCode> TO [<idProcedure>]

SET PROCEDURE *:

Compile procedures/functions into the current .OBJ file

SET PROCEDURE TO [<idProgramFile>[.<ext>]]

WAIT* :

Suspend program processing until a key is pressed

WAIT [<expPrompt>] [TO <idVar>]

Statements :

ANNOUNCE :

Declare a module identifier

ANNOUNCE <idModule>

 BEGIN SEQUENCE :

Define a sequence of statements for a BREAK

BEGIN SEQUENCE
       <statements>...
    [BREAK [<exp>]]
       <statements>...
    [RECOVER [USING <idVar>]]
       <statements>...
END [SEQUENCE]

DO CASE :

Execute one of several alternative blocks of statements

DO CASE
   CASE <lCondition1>
       <statements>...
   [CASE <lCondition2>]
       <statements>...
   [OTHERWISE]
       <statements>...
END[CASE]

DO WHILE :

Execute a loop while a condition is true (.T.)

[DO] WHILE <lCondition>
    <statements>...
    [EXIT]
    <statements>...
    [LOOP]
    <statements>...
END[DO]

EXIT PROCEDURE :

Declare an exit procedure

EXIT PROCEDURE <idProcedure>
    [FIELD <idField list> [IN <idAlias>]]
    [LOCAL <identifier> [[:= <initializer>]]]
    [MEMVAR <identifer list>]
    .
    . <executable statements>
    .
[RETURN]

EXTERNAL* :

Declare a list of procedure or user-defined function names

EXTERNAL <idProcedure list>

FOR :

Execute a block of statements a specified number of times

FOR <idCounter> := <nStart> TO <nEnd> [STEP <nIncrement>]
    <statements>...
    [EXIT]
    <statements>...
    [LOOP]
NEXT

FUNCTION :

Declare a user-defined function name and formal parameters

[STATIC] FUNCTION <idFunction>[(<idParam list>)]
    [LOCAL <identifier> [[:= <initializer>], ... ]]
    [STATIC <identifier> [[:= <initializer>], ... ]]
    [FIELD <identifier list> [IN <idAlias>]]
    [MEMVAR <identifier list>]
    .
    . <executable statements>
    .
RETURN <exp>

IF :

Execute one of several alternative blocks of statements

IF <lCondition1>
    <statements>...
[ELSEIF <lCondition2>]
    <statements>...
[ELSE]
    <statements>...
END[IF]

INIT PROCEDURE :

Declare an initialization procedure

INIT PROCEDURE <idProcedure> [(<idParam list>)]
    [FIELD <idField list> [IN <idAlias>]]
    [LOCAL <identifier> [[:= <initializer>]]]
    [MEMVAR <identifer list>]
    .
    . <executable statements>
    .
[RETURN]

NOTE :

Place a single-line comment in a program file

NOTE This is a comment line

PARAMETERS :

Create private parameter variables

PARAMETERS <idPrivate list>

PROCEDURE :

Declare a procedure name and formal parameters

[STATIC] PROCEDURE <idProcedure> [(<idParam list>)]
    [FIELD <idField list> [IN <idAlias>]
    [LOCAL <identifier> [[:= <initializer>], ... ]]
    [MEMVAR <identifier list>]
    [STATIC <identifier> [[:= <initializer>], ... ]]
    .
    . <executable statements>
    .
[RETURN]

REQUEST :

Declare a module request list

REQUEST <idModule list>

RETURN :

Terminate a procedure, user-defined function or program

RETURN [<exp>]

Functions :

BREAK() :

Branch out of a BEGIN SEQUENCE…END construct

BREAK(<exp>) --> NIL

EVAL() :

Evaluate a code block

EVAL(<bBlock>, [<BlockArg list>]) --> LastBlockValue

IF() :

Return the result of an expression based on a condition

[I]IF(<lCondition>, <expTrue>, <expFalse>) --> Value

PCOUNT() :

Determine the position of the last actual parameter passed

PCOUNT() --> nLastArgumentPos

SETKEY() :

Assign an action block to a key

SETKEY(<nInkeyCode>, [<bAction>]) --> bCurrentAction

SETCANCEL() :

Toggle Alt-C and Ctrl-Break as program termination keys

SETCANCEL([<lToggle>]) --> lCurrentSetting

WORD()* :

Convert CALL command numeric parameters from double to int

WORD(<nNumber>) --> NIL