StrSwap
StrTran
StrZero
SubStr
Modify the date format to include or omit century digits
SET CENTURY on | OFF | <xlToggle>
Define screen colors
SET COLOR | COLOUR TO [[<standard>]
    [,<enhanced>] [,<border>] [,<background>]
    [,<unselected>]] | (<cColorString>)
Toggle required exit key to terminate GETs
SET CONFIRM on | OFF | <xlToggle>
Toggle console display to the screen
SET CONSOLE ON | off | <xlToggle>
Toggle the screen cursor on or off
SET CURSOR ON | off | <xlToggle>
Set the date format for input and display
SET DATE FORMAT [TO] <cDateFormat>
SET DATE [TO] AMERICAN | ansi | british | french
    | german | italian | japan | usa
Set the number of decimal places displayed
SET DECIMALS TO [<nDecimals>]
Toggle or define GET delimiters
SET DELIMITERS on | OFF | <xlToggle>
SET DELIMITERS TO [<cDelimiters> | DEFAULT]
Direct @…SAYs to the screen or printer
SET DEVICE TO SCREEN | printer
Control the interpretation of dates with no century digits
SET EPOCH TO <nYear>
Toggle fixing of the number of decimal digits displayed
SET FIXED on | OFF | <xlToggle>
Toggle asterisk (*) interpretation in SET COLOR
SETBLINK([<lToggle>]) --> lCurrentSetting
Return the current colors and optionally set new colors
SETCOLOR([<cColorString>]) --> cColorString
Set the cursor shape
SETCURSOR([<nCursorShape>]) --> nCurrentSetting
Change display mode to specified number of rows and columns
SETMODE(<nRows>, <nCols>) --> lSuccess
Move the cursor to a new position
SETPOS(<nRow>, <nCol>) --> NIL
 SETMODE()
 Change display mode to a specified number of rows and columns
------------------------------------------------------------------------------
 Syntax

     SETMODE(<nRows>, <nCols>) --> lSuccess

 Arguments

     <nRows> is the number of rows in the desired display mode.

     <nCols> is the number of columns in the desired display mode.

 Returns

     SETMODE() returns true (.T.) if the mode change was successful;
     otherwise, it returns false (.F.).

 Description

     SETMODE() is an environment function that attempts to change the mode of
     the display hardware to match the number of rows and columns specified.
     The change in screen size is reflected in the values returned by
     MAXROW() and MAXCOL().

     Note:  In LLG_VIDEO_TXT mode, and when a VESA driver is present, it
     is possible to use the following values :
     25,80 | 43,80 | 50,80 | 60,80 | 25,132 | 43,132 | 50,132 | 60,132

 Examples

     .  This example switches to a 43-line display mode:

        IF SETMODE(43, 80)
           ? "43-line mode successfully set"
        ELSE
           ? "43-line mode not available"
        ENDIF

     .  This example switches the video mode to regular text mode with
        60 rows and 132 columns:

        // Switch to text mode
        SET VIDEOMODE( LLG_VIDEO_TXT )
        // Set the video mode to the largest number of characters
        SETMODE( 60,132 )

 Files   Library is CLIPPER.LIB.
See Also: SET VIDEOMODE
/*
From Harbour changelog (at 2007-04-04 10:35 UTC+0200 By Przemyslaw Czerpak )
Added set of functions to manipulate string tokens:
HB_TOKENCOUNT( <cString>, [ <cDelim> ], [ <lSkipStrings> ],
[ <lDoubleQuoteOnly> ] ) -> <nTokens>
HB_TOKENGET( <cString>, <nToken>, [ <cDelim> ], [ <lSkipStrings> ],
[ <lDoubleQuoteOnly> ] ) -> <cToken>
HB_TOKENPTR( <cString>, @<nSkip>, [ <cDelim> ], [ <lSkipStrings> ],
[ <lDoubleQuoteOnly> ] ) -> <cToken>
HB_ATOKENS( <cString>, [ <cDelim> ], [ <lSkipStrings> ],
[ <lDoubleQuoteOnly> ] ) -> <aTokens>
All these functions use the same method of tokenization. They can
accept as delimiters string longer then one character. By default
they are using " " as delimiter. " " delimiter has special mening
Unlike other delimiters repeted ' ' characters does not create empty
tokens, f.e.:
HB_ATOKENS( " 1 2 3 " ) returns array:
{ "1", "2", "3" }
Any other delimiters are restrictly counted, f.e.:
HB_ATOKENS( ",,1,,2,") returns array:
{ "", "", "1", "", "2", "" }
And a strong suggession made at 2009-12-09 21:25 UTC+0100 ( By Przemyslaw Czerpak )
I strongly suggest to use hb_aTokens() and hb_token*() functions.
They have more options and for really large data many times
(even hundreds times) faster.
*/
#define CRLF HB_OsNewLine()
PROCEDURE Main()
LOCAL cTextFName := "Shakespeare.txt",;
c1Line
SET COLO TO "W/B"
SetMode( 40, 120 )
CLS
HB_MEMOWRIT( cTextFName,;
"When in eternal lines to time thou grow'st," + CRLF + ;
"So long as men can breathe, or eyes can see," + CRLF + ;
"So long lives this, and this gives life to thee." )
aLines := HB_ATOKENS( MEMOREAD( cTextFName ), CRLF )
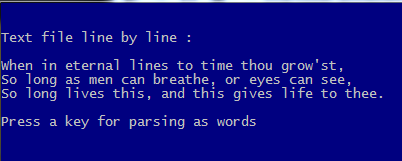
?
? "Text file line by line :"
?
AEVAL( aLines, { | c1Line | QOUT( c1Line ) } )
?
WAIT "Press a key for parsing as words"
CLS
?
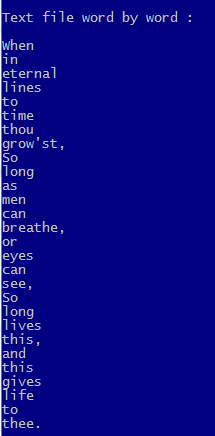
? "Text file word by word :"
?
FOR EACH c1Line IN aLines
a1Line := HB_ATOKENS( c1Line )
AEVAL( a1Line, { | c1Word | QOUT( c1Word ) } )
NEXT
?
WAIT "Press a key for parsing directly as words"
CLS
?
? "Text file directly word by word :"
?
aWords := HB_ATOKENS( MEMOREAD( cTextFName ) )
AEVAL( aWords, { | c1Word | QOUT( c1Word ) } )
?
@ MAXROW(), 0
WAIT "EOF TP_Token.prg"
RETURN // TP_Token.Main()
/*
FParse()
Parses a delimited text file and loads it into an array.
Syntax :
FParse( <cFileName>, <cDelimiter> ) --> aTextArray
Arguments :
<cFileName> : This is a character string holding the name of the text file to load
 into an array. It must include path and file extension.
 If the path is omitted from <cFileName>,
 the file is searched in the current directory.

 <cDelimiter> : This is a single character used to parse a single line of text.
 It defaults to the comma.
Return :
The function returns a two dimensional array, or an empty array when the file
cannot be opened.

Description :

 Function FParse() reads a delimited text file and parses each line
 of the file at <cDelimiter>. The result of line parsing is stored in an array.
This array, again, is collected in the returned array,
 making it a two dimensional array
FParse() is mainly designed to read the comma-separated values (or CSV) file format,
 were fields are separated with commas and records with new-line character(s).

Library is : xHb

*/
#define CRLF HB_OsNewLine()
PROCEDURE Main()
LOCAL cTextFName := "Shakespeare.txt",;
      a1Line

 SET COLO TO "W/B"
 SetMode( 40, 120 )

 CLS

 HB_MEMOWRIT( cTextFName,;
              "When in eternal lines to time thou grow'st," + CRLF + ;
              "So long as men can breathe, or eyes can see," + CRLF + ;
              "So long lives this, and this gives life to thee." )

 aLines := FParse( cTextFName, " " )

 ?
 ? "Text file word by word :"
 ?
 FOR EACH a1Line IN aLines
    AEVAL( a1Line, { | c1Word | QOUT( c1Word ) } )
 NEXT
 ?
 @ MAXROW(), 0
 WAIT "EOF TP_FParse.prg"

RETURN // TP_FParse.Main()
*-._.-._.-._.-._.-._.-._.-._.-._.-._.-._.-._.-._.-._.-._.-._.-._.-._.-._.-._.-._.-._.-._.-._.-._.-._.
/*
 Since a <Value> of a hash's pair may be in any scalar or complex type,
 a hash may be nested by assigning an another hash to a hash <Value>.

*/
PROCEDURE Main()
   SET COLO TO "W/B"
   SetMode( 50, 120 )

   CLS

   hSouth := { 'Argentina' => "Buenos Aires",;
               'Brasil'    => "Brasilia",;
               'Chile'     => "Santiago" }

   hNorth:= { 'USA'    => "Washington DC",;
              'Canada' => "Ottawa",;
              'Mexico' => "Mexico City" }

   * a hash contains two hashes :

   hAmerica := { "America" => { "North" => hNorth,;
                                "South" => hSouth } }

   * Standart array indexing syntax :

   ? hAmerica[ "America", "North", "USA" ] // Washington DC

   * Alternate syntax to indexing :

   ? hAmerica[ "America"][ "South" ][ "Chile" ] // Santiago

   ?
   @ MAXROW(), 0
   WAIT "EOF HashNest.prg"

RETURN // HashNest.Main()
*-._.-._.-._.-._.-._.-._.-._.-._.-._.-._.-._.-._.-._.-._.-._.-._.-._.-._.-._.-._.-._.-._.-._.-._.-._.
Consider a table for customers records with two character fields : Customer ID and customer name:
| Cust_ID | Cust_Name |
| CC001 | Pierce Firth |
| CC002 | Stellan Taylor |
| CC003 | Chris Cherry |
| CC004 | Amanda Baranski |
It’s known all possible and necessary operations on a table: APPEND, DELETE, SEEK and so on; by the way, for SEEK we need an index file also.
Listing this table is quite simple:
USE CUSTOMER
WHILE .NOT. EOF()
? CUST_ID, CUST_NAME
DBSKIP()
ENDDO
If our table is sufficiently small, we can find a customer record without index and SEEK :
LOCATE FOR CUST_ID = “CC003”
? CUST_ID, CUST_NAME
If we want all our data will stand in memory and we could manage it more simple and quick way, we would use an array ( with some considerations about size of table; if it is too big, this method will be problematic ) :
aCustomer := {} // Declare / define an empty array
USE CUSTOMER
WHILE .NOT. EOF()
AADD(aCustomer, { CUST_ID, CUST_NAME } )
DBSKIP()
ENDDO
Traversing this array is quite simple :
FOR nRecord := 1 TO LEN( aCustomer )
? aCustomer[ nRecord, 1 ], aCustomer[ nRecord, 2 ]
NEXT
or :
a1Record := {}
FOR EACH a1Record IN aCustomer
? a1Record[ 1 ], a1Record[ 2 ]
NEXT
And locating a specific record too:
nRecord := ASCAN( aCustomer, { | a1Record | a1Record[ 1 ] == “CC003” } )
? aCustomer[ nRecord, 1 ], aCustomer[ nRecord, 2 ]
A lot of array functions are ready to use for maintain this array : ADEL(), AADD(), AINS() etc …
Now, let’s see how we could use a hash for achieve this job :
hCustomer := { => } // Declare / define an empty hash
USE CUSTOMER
WHILE .NOT. EOF()
hCustomer[ CUST_ID ] := CUST_NAME
DBSKIP()
ENDDO
Let’s traversing :
h1Record := NIL
FOR EACH h1Record IN hCustomer
? h1Record: __ENUMKEY(),h1Record:__ENUMVALUE()
NEXT
Now, we have a bit complicate our job; a few field addition to the table :
| No: | Field Name | Type | Width | Dec | Decription |
|
1 |
CUST_ID |
C |
5 |
0 |
Id ( Code ) |
|
2 |
CUST_NAME |
C |
10 |
0 |
Name |
|
3 |
CUST_SNAM |
C |
10 |
0 |
Surname |
|
4 |
CUST_FDAT |
D |
8 |
0 |
First date |
|
5 |
CUST_ACTV |
L |
1 |
0 |
Is active ? |
|
6 |
CUST_BLNCE |
N |
11 |
2 |
Balance |
While <key> part of an element of a hash may be C / D / N / L type; <xValue> part of hash too may be ANY type of data, exactly same as arrays.
So, we can make fields values other than first ( ID) elements of an array:
hCustomer := { => } // Declare / define an empty hash
USE CUSTOMER
WHILE .NOT. EOF()
a1Data:= { CUST_NAME, CUST_SNAM, CUST_FDAT, CUST_ACTV, CUST_BLNCE }
hCustomer[ CUST_ID ] := a1Data
DBSKIP()
ENDDO
Let’s traversing :
h1Record := NIL
FOR EACH h1Record IN hCustomer
a1Key := h1Record:__ENUMKEY()
a1Data := h1Record:__ENUMVALUE()
? a1Key
AEVAL( a1Data, { | x1 | QQOUT( x1 ) } )
NEXT
*-._.-._.-._.-._.-._.-._.-._.-._.-._.-._.-._.-._.-._.-._.-._.-._.-._.-._
/*
Hash vs Tables

*/
#define NTrim( n ) LTRIM( STR( n ) )
#define cLMarj SPACE( 3 )
PROCEDURE Main()

  SET DATE GERM
  SET CENT ON
  SET COLO TO "W/B"
  SetMode( 40, 120 )

  CLS

  hCustomers := { => } // Declare / define an empty PRIVATE hash

  IF MakUseTable()

     Table2Hash()

     * Here the hash hCustomers may be altered in any way

     ZAP

     Hash2Table()

  ELSE
      ? "Couldn't make / USE table"
  ENDIF

  ?
  @ MAXROW(), 0
  WAIT "EOF HashVsTable.prg"

RETURN // HashVsTable.Main()
*-._.-._.-._.-._.-._.-._.-._.-._.-._.-._.-._.-._.-._.-._.-._.-._.-._.-._.-._.-._.-._.-._.-._.-._.-._.
PROCEDURE Table2Hash()
   hCustomers := { => }
   WHILE .NOT. EOF()
     hCustomers[ CUST_ID ] := CUST_SNAM
     DBSKIP()
   ENDDO

   ListHash( hCustomers, "A hash transferred from a table (single value)" )

   hCustomers := { => } // Declare / define an empty hash
   DBGOTOP()
   WHILE .NOT. EOF()
      hCustomers[ CUST_ID ] := { CUST_NAME, CUST_SNAM, CUST_FDAT, CUST_ACTV, CUST_BLNCE }
      DBSKIP()
   ENDDO

   ListHash( hCustomers, "A hash transferred from a table (multiple values)" )

RETURN // Table2Hash()

*-._.-._.-._.-._.-._.-._.-._.-._.-._.-._.-._.-._.-._.-._.-._.-._.-._.-._.-._.-._.-._.-._.-._.-._.-._.

PROCEDURE Hash2Table()
   LOCAL h1Record,;
         c1Key,;
         a1Record,;
         n1Field

   FOR EACH h1Record IN hCustomers
      c1Key := h1Record:__ENUMKEY()
      a1Record := h1Record:__ENUMVALUE()
      DBAPPEND()
      FIELDPUT( 1, c1Key )
      AEVAL( a1Record, { | x1, n1 | FIELDPUT( n1 + 1 , x1 ) } )
   NEXT h1Record
   DBGOTOP()

   ?
   ? "Data trasferred from hash to table :"
   ?
   WHILE ! EOF()
      ? STR( RECN(), 5), ''
      FOR n1Field := 1 TO FCOUNT()
         ?? FIELDGET( n1Field ), ''
      NEXT n1Field
      DBSKIP()
   ENDDO

RETURN // Hash2Table()

*-._.-._.-._.-._.-._.-._.-._.-._.-._.-._.-._.-._.-._.-._.-._.-._.-._.-._.-._.-._.-._.-._.-._.-._.-._.

PROCEDURE ListHash( hHash, cComment )

  LOCAL x1Pair

  cComment := IF( HB_ISNIL( cComment ), '', cComment )

  ?
  ? cComment // , "-- Type :", VALTYPE( hHash ), "size:", LEN( hHash )
  ?
  IF HB_ISHASH( hHash )
     FOR EACH x1Pair IN hHash
        nIndex := x1Pair:__ENUMINDEX()
        x1Key := x1Pair:__ENUMKEY()
        x1Value := x1Pair:__ENUMVALUE()
        ? cLMarj, NTrim( nIndex )
*       ?? '', VALTYPE( x1Pair )
        ?? '', x1Key, "=>"
*       ?? '', VALTYPE( x1Key )
*       ?? VALTYPE( x1Value )
        IF HB_ISARRAY( x1Value )
           AEVAL( x1Value, { | x1 | QQOUT( '', x1 ) } )
        ELSE
           ?? '', x1Value
        ENDIF
     NEXT
  ELSE
    ? "Data type error; Expected hash, came", VALTYPE( hHash )
  ENDIF HB_ISHASH( hHash )
RETURN // ListHash()
*-._.-._.-._.-._.-._.-._.-._.-._.-._.-._.-._.-._.-._.-._.-._.-._.-._.-._.-._.-._.-._.-._.-._.-._.-._.

FUNCTION MakUseTable() // Make / USE table

 LOCAL cTablName := "CUSTOMER.DBF"
 LOCAL lRetval, aStru, aData, a1Record

 IF FILE( cTablName )
    USE (cTablName)
 ELSE
    aStru := { { "CUST_ID", "C", 5, 0 },;
               { "CUST_NAME", "C", 10, 0 },;
               { "CUST_SNAM", "C", 10, 0 },;
               { "CUST_FDAT", "D", 8, 0 },;
               { "CUST_ACTV", "L", 1, 0 },;
               { "CUST_BLNCE", "N", 11, 2 } }
    *
    * 5-th parameter of DBCREATE() is alias -
    * if not given then WA is open without alias
    *                              ^^^^^^^^^^^^^
    DBCREATE( cTablName, aStru, , .F., "CUSTOMER" )

    aData := { { "CC001", "Pierce", "Firth", 0d20120131, .T., 150.00 },;
               { "CC002", "Stellan", "Taylor", 0d20050505, .T., 0.15 },;
               { "CC003", "Chris", "Cherry", 0d19950302, .F., 0 },;
               { "CC004", "Amanda", "Baranski", 0d20011112, .T., 12345.00 } }

    FOR EACH a1Record IN aData
        CUSTOMER->(DBAPPEND())
        AEVAL( a1Record, { | x1, nI1 | FIELDPUT( nI1, X1 ) } )
    NEXT a1Record
    DBGOTOP()

 ENDIF

 lRetval := ( ALIAS() == "CUSTOMER" )

RETURN lRetval // MakUseTable()

*-._.-._.-._.-._.-._.-._.-._.-._.-._.-._.-._.-._.-._.-._.-._.-._.-._.-._


