Format of xBase Files

xBase File Format Description

xBase File Types

xBase File  Types and Extensions

Ext. File Type  Introduced or used by
.$$$ temporary file  dBASE III
.$db temporary file  dBASE IV
.act FoxDoc Action Diagrams  FoxPro
.app application object file  dBASE Appl. Generator
.app generated application  FoxPro
.bak Backup file  dBASE
.bar horizontal bar menu object file  dBASE Appl. Generator
.bin Binary files  dBASE
.bch batch process object file  dBASE Appl. Generator
.cac executable when caching on/off  dBASE IV
.cat catalog  dBASE III, IV
.cdx compound index  FoxPro
.ch header file  Clipper
.cht interface file for ChartMaster  dBASE
.clp compiler script file (clip list)  Clipper
.cmd command  dBASE – Waffle
.cod template source file  dBASE Appl. Generator
.cpt encrypted memo file  dBASE
.crp encrypted database  dBASE IV
.ctl control file  dBASE IV – Aldus Setup
.cvt backup file for CONVERTed database file  dBASE IV
.db configuration  dBASE
.db$ temporary file  dBASE
.db2 database  dBASE II
.db3 database  dBASE III
.dbf database file  dBASE – FoxPro
.dbk database backup  dBASE IV
.dbo compiled program  dBASE IV
.dbt FoxBASE+ style memo  FoxPro
.dbt memo file for database w/same name  dBASE – Clipper
.def Definitions list  dBASE
.dif Data Interchange Format. For APPEND FROM, COPY  dBASE – VisiCal
.doc Documentation text file  dBASE Appl. Generator
.fil files list object file  dBASE Appl. Generator
.fky macro file  FoxPro
.fmo compiled format file  dBASE IV
.fmt format file  dBASE – FoxPro – Clipper
.fp configuration file  FoxPro
.fpc catalog  FoxPro
.fpt memo  FoxPro
.fr3 renamed dBASE III+ form file  dBASE IV
.frg uncompiled report file, code fragment file  dBASE IV
.frm report file  dBASE – Clipper
.fro compiled report file  dBASE IV
.frt report memo  FoxPro
.frx report  FoxPro
.fw2 Framework spreadsheet or database file  Framework – dBASE
.fxp compiled format  FoxPro
.gen compiled template  dBASE Appl. Generator
.idx index (many)  FoxPro
.ind include index  dBASE IV
.inx index  FoxBase
.key Key macro library  dBASE
.lbg label generator data  dBASE IV
.lbl label  dBASE – Clipper
.lbo compiled label  dBASE IV
.lbt label memo  FoxPro
.lbx label  FoxPro
.ld1 overlay file  dBASE
.log Transaction log file  dBASE
.mbk multiple index file backup  dBASE IV
.mdx multiple index file  dBASE IV
.mem memory variable save file  dBASE – FoxPro
.mnt menu memo  FoxPro
.mnx menu  FoxPro
.mpr generated program  FoxPro
.mpx compiled menu program  FoxPro
.ndx index file  dBASE
.npi source for DGEN.EXE interpreter  dBASE Appl. Generator
.ntx index file  Clipper
.pjt project memo  FoxPro
.pjx project  FoxPro
.plb library  FoxPro
.pll pre-linked library  Clipper
.plt pre-linked transfer file  Clipper
.pop pop-up menu object  dBASE Appl. Generator
.ppo pre-processor output  Clipper
.pr2 printer driver  dBASE IV
.pr3 PostScript printer driver  dBASE IV
.prf printer driver  dBASE IV
.prg program source file  dBASE – FoxPro – Clipper
.prs procedure  dBASE IV
.prt Print dump  dBASE
.prx compiled program  FoxPro
.qbe saved query (Query By Example)  dBASE IV – Quattro Pro
.qbo compiled query  dBASE IV
.qpr generated query program  FoxPro
.qpx compiled query program  FoxPro
.qry query  dBASE IV
.res dBASE resources  dBASE IV
.rpd Rapid file. For IMPORT/EXPORT,APPEND  FROM, COPY  dBASE
.sc3 renamed dBASE III screen mask file  dBASE IV
.scr screen – screen snapshot  dBASE IV
.sct screen memo  FoxPro
.scx screen  FoxPro
.spr generated screen program  FoxPro
.spx compiled screen program  FoxPro
.str structure list object file  dBASE Appl. Generator
.t44 Temporary file for Sort or Index  dBASE IV
.tbk memo backup  dBASE IV – FoxPro
.tvf table view settings  dBASE
.upd update data  dBASE
.upo compiled update data  dBASE
.val values list object file  dBASE Appl. Generator
.vew view file  Clipper, Lotus Approach
.vue view  dBASE IV – FoxPro
.w44 temporary file for Sort or Index  dBASE
.wfm form object  dBASE Form Designer
.win window file  FoxPro – dBASE

Source :  http://www.clicketyclick.dk/databases/xbase/format/index.html

Notes:

–          Such a list can’t be perfect. Some item may be obsolete / forgotten and something may not exist when this list compiled.

–          “Clipper” may not include all versions of Clipper.

–          Most of Clipper files are supported by Harbour.

Quick Start to Migration

Chapter I – Text to text conversion

In Clipper world, “migration” means “convert a DOS based Clipper program to Windows”. This is a dream of every Clipper – DOS programmer.

 Before all, we need clarify some terms:

May be found multiple ways for convert a DOS based Clipper program to Windows. In general, DOS programs are runs in “text” mode and Windows program runs in “Graphic” mode; and this is what meant by term “migration”.

Converting a text mode program to directly GUI (Graphical User Interface) is a painful job. First, we need to find a Compiler with GUI support, or a GUI library usable with a specific compiler. If we have more than one opportunity ( yes, it is so ) we need make a choice between them.

For make a right selection we need learn, understand specialties of each option and differences between them.

Believe me, this is an endless way 😦

Instead, let’s begin with simpler thing: convert a DOS text mode program to Windows text mode program.

Question: Without GUI, what meaning will be to migrate from DOS to Windows?

Answer: Good question and like all good question, answer isn’t easy.

First, modern OSs moves away day to day from DOS conditions; memory problems, screen problems, codepage problems, etc… By the time, building / running 16 bit executable becomes more difficult day to day.

Whereas Harbour already is a 32 / 64 bit compiler.

Second, all DOS Compilers for Clipper are commercial and registration required products; furthermore they are almost out of sold for this days; what compiler you could use?

And third, Harbour is best free compiler and the best way to use a free GUI tool for xBase language.

So, beginning with using Harbour in text mode is the best start point, I think.

First step is downloading and install HMG or Harbour. If you didn’t past this step yet please refer previous articles in this section or “Links” page of this blog.

The easiest way for using Harbour compiler is calling hbmk2, the wonderful project maker for Harbour compiler.

Depending your installation, hbmk2 may be in different locations; such as C:\Harbour\bin or c:\hmg\harbour\bin or anything else.

Hereafter I will assume that your hbmk2 is in C:\hmg\Harbour\bin. If your installation is different, please modify above examples.

Second step is assign an empty folder (directory) for work / test affairs; say C:\test.

And the third step is copying your Clipper program(s) to this folder.

But don’t rush; we have some precautions:

– Better way is starting with a single-program project; if you haven’t written a new one. Don’t uses for now projects have multiple program file.

 – Your program may have some “national” characters and these characters may be differently shown between DOS and Windows. If so, you may want fix manually these differences via a Windows based text editor. Or use a program if you have one. Harbour has a clever tool (HB_OEMTOANSI() function) is usable for this purpose.

 – In Clipper it’s possible a program file without module (procedure / function) definition. If you have such file(s), enclose your code with PROCEDURE — RETURN statement pair.

– Every Harbour project must have one and only one MAIN module (procedure / function). The first procedure / function in your single program file will be considered as MAIN module of your project. (In HMG, name of this module must be “main” also).

– Almost all Clipper commands, statement, functions, pseudo functions, manifest constants etc are usable almost in the same ways with Clipper. May be exist some very few and very rare differences, and of course solving methods for its.

For compile process we will use command box (DOS / console window) of Windows. You can open a console window, with the menu Start -> Run -> cmd or selecting it in the “Command Prompt” from the Start Menu \ All Programs.

 – “Command / console window” size may not appropriate for easy use. You may

      – use a MODE ( DOS ) command :

         MODE CON LINES=54 COLS=148

       or

   – adding a SetMode() statement at the beginning of MAIN module of your project. For example:

       SetMode( 25,  80 )  // 25 line 80 column same as standard 
                           // DOS screen ( but not full screen ! )
       SetMode( 48, 128 )  // 48 line 128 column, may be more readable

Now, we are ready to begin: Enter this command in console window :

 C:\hmg\harbour\bin hbmk2 <mainPrgName>

You don’t need any SET command (such as PATH etc) before this command; hbmk2 will find all necessary paths / files.

For running executable after compile, add a -run switch to the command line :

 C:\hmg\harbour\bin hbmk2 <mainPrgName> -run

Of course, you need supply name of your main .prg file in place of <mainPrgName>.

Note that you don’t need a separate “linking” step; hbmk2 will do everything for you.

You may use this

 C:\hmg\harbour\bin hbmk2 <mainPrgName>

command via a batch ( .bat ) command file (such as “build.bat”) too. In this way you can apply compiling process without console window; run .bat file by double click in the Windows Explorer. In this case you may need add a PAUSE command at end of .bat file.

That’s all.

You know, a program file may contains more than one module (procedure / function). So you may develop your project by adding new modules to your single program file.

In this step you don’t need trying extra features, extensions of Harbour. Before that adventure your primary need is to convert existing project Clipper to Harbour.

When you reach a level of multiple-program file project:

– Basic rules are the same: the first module in the your program file is MAIN module of your project.

If your .prg files contains:

  SET PROCEDURE TO <procedure_File_Name>

 and / or

   #include <procedure_File_Name>

 you may or may not continue using these statement.

 – The shortest way for compiling a multiple-file project is use a .hbp ( Harbour Projet ) file. This is a text file and its simplest form is a file contains list of your .prg files. For example:

myprog01.prg
myprog02.prg
myprog03.prg
myprog04.prg

and the compile command is the same :

  C:\hmg\harbour\bin hbmk2 <mainProjectFileName>

In this case you don’t need to use SET PROC… and #include … statement and this is the better way.

Because hbmk2 applies “incremental” compiling, that is compiles only modified files.

Under normal circumstances, any module in any program file is callable in anywhere in the project. If you have some modules that exclusive to this program file, you may use STATIC keyword at the beginning of PROCEDURE / FUNCTION statement. For example:

STATIC FUNCTION OpenTable()

With this syntax you will prevent calling this module outside of this .prg file and the possibility of using this module name into other .prg files.

Example :

Take “A typical Harbour Program” in the “Harbour Sample” page.

As seen at .pdf file by given link, this sample program borrowed from official reference guide of a Clipper compiler. That is, in fact this is a Clipper program and it will may compile with Harbour and run without any modification.

Let’s try.

– Copy and paste this sample and save in your PC with a name say “typical.prg”.

– Comment out the line for now.

 #include "Database.prg" // Contains generic database functions

– Call hbmk2:

 C:\hmg\harbour\bin hbmk2 typical -run

 Note: While working / playing on programs, you may encounter some error messages like:

  Error F0029  Can't open #include file xxx
  Error E0002  Redefinition of procedure or function xxx
  Error: Referenced, missing, but unknown function(s): xxx
  undefined reference to HB_FUN_xxx

 Please don’t panic !

    “Error” is salt and pepper of programming play ! 😉

 The worst situation isn’t getting error, but is unable to stay !

   The “HB_FUN_xxx” may be seen weird at first meet. The “HB_FUN_” is a prefix given by system ( compiler ) to your function; so you need search erroneous point into tour program files without this prefix.

Now, let’s continue to our “typical” program:

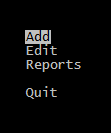
If you compile the program with commented out #include … line, possibly it will work, by opening main menu:

Typical_1

But what’s that?

When selected a menu item (except “Quit”) we can’t see other than an empty screen!

Again, don’t panic!

This situation too is not very rare !

If you use vertical scroll bar of command / console window, you will notice that your screen is considerably much longer than seen !

To avoid this conflict, ( as stated above ) we need use a SetMode() function call at top of our Main() procedure ( but AFTER LOCAL statement ! ) :

  SetMode( 24, 79 )

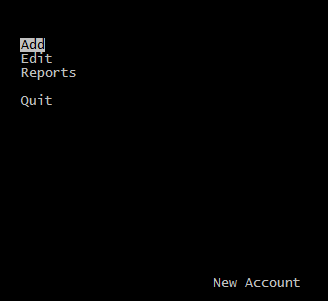
 And now everything is OK.

Typical_2

In fact, not really everything, we have a few “fine adjustment”.

Cut and paste the section after “// Database.prg” to a separate “Database.prg” file, un-comment the “#include …” line and then re-compile.

In this case we have a “multiple prg” project. As stated earlier, better way is using a .hbp file instead of “#include …” statements.

Now comment out ( or delete now ) the #include line.

Build a new text file with name “typical.hbp” and with this content :

Typical.prg
DataBase.prg

And recall hbmk2 without any modification :

C:\hmg\harbour\bin hbmk2 typical -run

That’s all !

Congratulations !

Now you have a multiple-prg project  !

Design of Clipper

build the truly reusable routine

Configuration Terms

Application :

A program designed to execute a set of interrelated tasks. Typically referring to a system designed to address a particular business purpose (e.g., Order Entry/Inventory/Invoicing, a document tracking database, or an insurance claims calculator).

Environment Variables :

Operating system variables that can be used to communicate configuration information to executable programs. Environment variables are manipulated using the DOS SET command. The Clipper language compiler and linker respond to certain environment variables. Clipper programs can inspect the settings of environment variables using the GETENV() function.

Executable File :

A file output from the linker directly executable from the operating system command line. Executable files have an .EXE extension.

See Also: Linker

Header File :

A source file containing manifest constant definitions; command or pseudofunctions; and/or program statements merged into another source file using the #include preprocessor directive.

See Also: Program File, Source Code, STD.CH

Library File :

A file containing one or more object modules. The linker searches specified libraries to resolve references to functions or procedures that were not defined in the object files being linked.

See Also: Linker, Module, Object File

Make File :

A text file used as input to a make utility containing the specifications and actions required to build a program or a system of programs. This file is often referred to as a description file.

See Also: Make

Object File :

A file that contains the output of a compiler or other language translator, generally the result of compiling a single source file. Object files are linked to create an executable program.

See Also: Linking, Program File

Procedure File :

An ASCII text file containing Clipper language procedure and function definitions usually ending with a (.prg) extension; a program file.

See Also: Program File

Program File :

An ASCII text file containing Clipper language source code. Program files usually end with a (.prg) extension. The compiler reads the program file, translates the source code, and produces an object file, that is then linked to produce an executable program.

See Also: Linking Object File Source Code

Script File :

A text file that contains command input to a compiler, linker, or other utility program. A script file is often used in lieu of equivalent keyboard input. For the Clipper compiler, script files contain a list of source files to be compiled into a single object file.

Source File :

A text file including source code.

See Also: Program File, Header File