#include "dbinfo.ch"
PROC Main()
* Test .prg for MemoFExtn() function

 SetMode( 25, 80 )
 CLS
 ? "Memo File extension :", MemoFExtn() // NIL
 ? REPL( "-", 80 )

 cTfName := "MFInTst1"
 aStruct := { { "FLD1", "C", 10, 0 } }

 DBCREATE( cTfName, aStruct )
 USE ( cTfName )

 ? "Memo File extension :", ">" + MemoFExtn() + "<" // ><
 ? REPL( "-", 80 )

 cTfName := "MFInTst2"
 aStruct := { { "FLD1", "M", 10, 0 } }
 DBCREATE( cTfName, aStruct )
 USE ( cTfName )
 ? "Memo File extension :", MemoFExtn() // .dbt
 ? REPL( "-", 80 )

 cTfName := "MFInTst3"
 aStruct := { { "FLD1", "M", 10, 0 } }
 DBCREATE( cTfName, aStruct, "DBFFPT" )
 USE ( cTfName )
 ? "Memo File extension :", MemoFExtn() // .fpt
 ? REPL( "-", 80 )

 ?
 WAIT "EOF MemoFExtn.prg"

RETURN // MemoFExtn.Main()
/*
Function MemoFExtn() -> Memo File Extension of current table

 Return : If current work area is empty : NIL
 elseIf current table not include MEMO field : ""
 else .dbt / or .fpt depending RDD used in creation of current table.

 Required :
 #include "dbinfo.ch"
Aug 2012

*/
FUNCTION MemoFExtn() // Memo file extension
LOCAL xRetVal

 IF !EMPTY( ALIAS() )
 IF DBINFO( DBI_MEMOHANDLE ) < 0
 xRetVal := ""
 ELSE
 xRetVal := DBINFO( DBI_MEMOEXT )
 ENDIF
 ENDIF !EMPTY( ALIAS() )

RETURN xRetVal // MemoFExtn()
Monthly Archives: August 2012
Clipper Programming Language
Basic Controls – 3
( Status Bar, Check Box )
We are continuing with Viva_HMG.hbp, Main.prg and Main.fmg.
While using a table and while navigating between its records, we need some extra info to show to user: Name of table, current record and record count in the table. So user always feels comfortable by knowing where is he / she; which table, which record?
The status bar control is convenient for this purpose and though this is a quite simple control, IDE has a builder for it: Status bar builder.
When you choose this builder ( after open the .fmg file by IDE of course ), a dialog box will open:
By using this dialog box we can define a status bar. We can prefer define status bar manually too:
    DEFINE STATUSBAR FONT "Tahoma" SIZE 9
        STATUSITEM "" WIDTH 300
        STATUSITEM "" WIDTH 40
        DATE         WIDTH 90
        CLOCK             WIDTH 90
    END STATUSBAR
After define status bar, we need assign values to its items. We don’t need assign values to DATE and CLOCK items, because these items will be updated by system (HMG) automatically.
First a little procedure :
PROCEDURE InitEdit()
EditReco.StatusBar.Item( 1 ) := cTableFNam
ReadData()
RETURN // InitEdit()
Change ON INIT event of EditReco form from ReadData() to InitEdit(.
And add this line at end of ReadData() procedure.
 EditReco.StatusBar.Item( 2 ) := LTRIM( STR( RECN() ) ) + "\" + ;
                                 LTRIM( STR( LASTREC() ) )
Let’s look at the result :
Whenever active record change, Item( 2 ) of Status Bar will be updated ( 5/25 ) in above picture.
In this step, user must use “Save” button every time current record edited. Whereas “Read” process is different; whenever current record changed, values of text boxes automatically updated. What about automatic save? May be, we can do this; but user may don’t want such automation. Asking a question like “Do you want save?” every change doesn’t a good way.
The better way may be: put a control to form such “Auto save” with On / Off option.
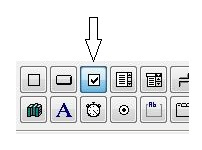
Yes, fortunately we have such control: Check Box.
We can replace a Check Box control to EditReco form with chbAutoSave name and Auto Save caption:
Now, how we will implement Auto Save process?.
By adding a little IF clause to ACTION events of navigation buttons:
Top : (IF(EditReco. chbAutoSave.Value , SaveData(), ), DBGOTOP(), ReadData() )
Next : (IF(EditReco. chbAutoSave.Value , SaveData(), ), DBSKIP(), ReadData() )
Previous : ( IF(EditReco. chbAutoSave.Value , SaveData(), ), DBSKIP( -1 ), ReadData() )
Last : (IF(EditReco. chbAutoSave.Value , SaveData(), ), DBGOBOTTOM(), ReadData() )
To be continued …
Fill a two dimensional array
/*
AFIL2.prg : Fill a two dimensional array with a fixed value

*/
PROCEDURE Main()

   SetMode( 25, 80 )
   CLS

   aArray := ARRAY( 5, 2 )

   AEVAL( aArray, { | a1 | QOUT( a1[ 1 ], a1[ 2 ] ) } )

   AEVAL( aArray, { | a1 | AFILL( a1, 0 ) } )

   AEVAL( aArray, { | a1 | QOUT( a1[ 1 ], a1[ 2 ] ) } )

   SETPOS( 23, 0 )
   WAIT "EOF AFIL2.prg"
RETURN // Main()
Remove a line from a text file
Remove first or last line in a text file.
Usage : Rem1Line( <cInFName>, <nLocat> )
Where :
<cInFName> : Name of tex file to proceed.
<nLocat> : Location; 1: First line 2: Last line
Resulting is a separate file.
Warning : first / last line may be empty.
You may call Rem1Line() function anywhere your programs.
For write output file to over source file :
– discard
IF "." $ cInFName
    cOutFNam := LEFT( cInFName, AT( ".", cInFName ) - 1 ) +;
                     HB_NTOS( nLocat ) +;
                     SUBSTR( cInFName, AT( ".", cInFName ) )
ELSE
    cOutFNam := cInFName + HB_NTOS( nLocat )
ENDIF

IF block and add : cOutFNam := cInFName

or simply change:

HB_MEMOWRIT( cOutFNam, cText )
line to
HB_MEMOWRIT( cInFName , cText )

August 2012
Download source file.
Basic Controls – 2
( Text Box )
We are continuing with Viva_HMG.hbp, Main.prg and Main.fmg. We have assign real actions other than MsgBox() to our two buttons now : Open File and Edit Record. Open File not required GUI controls ( at least for now ), so we can begin with it: For Open File we need a file ( a table ) first: it’s here; a table with four field: Clients.dbf :
No:  Field Name Type Width Dec
---  ---------  ---- ----- ---
  1  CLI_ID       N      5   0
  2  CLI_SNAM     C     12   0
  3  CLI_NAME     C     12   0
  4  CLI_TLF      C     11   0
And then add a little routine to Main.prg for open (USE) it:
PROCEDURE OpenTable()
IF FILE( "CLIENTS.DBF" )
USE CLIENTS
ELSE
MsgStop( "Clients.dbf file not found !")
ENDIF
RETURN // OpenTable()
And assign this procedure to ACTION of Open File button.
Now, we can begin Edit Record task. For this task we need a separate form, a sub form. Then let’s begin. “New form” from tool-bar and assign a name : EditReco. Assign a title : “Edit Record”, a type : MODAL. Our table has four fields, so we need four LABEL first:
Names : lblCLI_ID, lblCLI_SNAM, lblCLI_NAME, lblCLI_TLF;
Values ( Captions ) : ID, Surname, Name, Tlf
Rows : 60, 100, 140, 180 Col : 60
Cols : 60, 60, 60, 60
Widths : 70, 70, 70, 70
Alignement : RIGHT, RIGHT, RIGHT, RIGHT
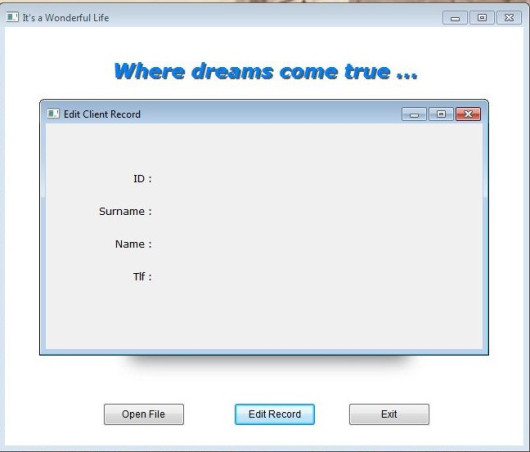
We can see our job at work:
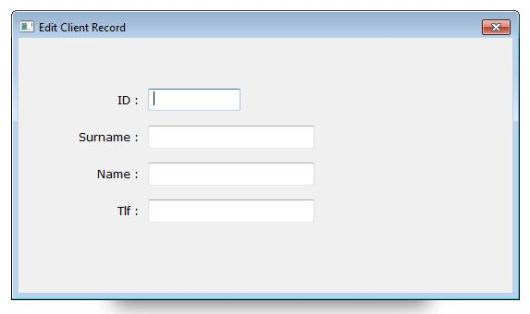
Now we need a place for display the current data and accept user input. The control for this purpose is text box. So we need to define four text boxes for each field in the table.
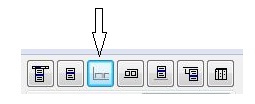
The button of text box in the IDE tool bar is :
Names : txbCLI_ID, txbCLI_SNAM, txbCLI_NAME, txbCLI_TLF;
Rows : 55, 95, 135, 175
Col : 140
DataTypes : First : NUMERIC, others : CHARACTER
We can see our job at work:
Well …
But where are table data ?
To see table data we need assign field values to text boxes as values.
Again, a little procedure:
PROCEDURE ReadData()
   EditReco.txbCLI_ID.Value   := CLIENTS->CLI_ID
   EditReco.txbCLI_SNAM.Value := CLIENTS->CLI_SNAM
   EditReco.txbCLI_NAME.Value := CLIENTS->CLI_NAME
   EditReco.txbCLI_TLF.Value  := CLIENTS->CLI_TLF
RETURN // ReadData()
and a call command for this procedure to ON INIT event of EditReco form.
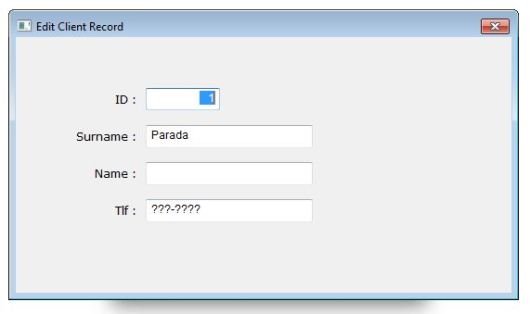
The result :
Everything is OK ?
No !
This is only first record of table; how we will see others ?
Yes, we need now yet another feature: navigation; that is travelling between records of table.
But before navigation, we have a problem: Open Table must be processed before Edit Record.
Otherwise a run time error will occurs: Alias does not exist.
What we can do?
– Discard Open Table button, open the table automatically; at beginning of program or at beginning of editing.
– Before editing, check the table, if doesn’t open,
– a) open automatically or
– b) warn user and don’t load Edit Table form.
Probably most convenient is : disable Edit Record button until table is open.
First a mini procedure :
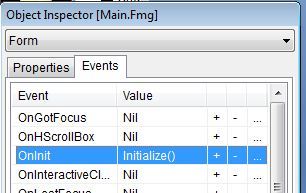
PROCEDURE Initialize()
Main.btnEditRec.Enabled := .F.
RETURN // Initialize()
And then add this procedure ON INIT event of form main:
Last point: enable it after USE table:
PROCEDURE OpenTable()
IF FILE( "CLIENTS.DBF" )
USE CLIENTS
Main.btnEditRec.Enabled := .T.
ELSE
MsgStop( "Clients.dbf file not found !")
ENDIF
RETURN // OpenTable()
Run and see:
Before Open File :
After Open File:
Now we can pass to navigation:
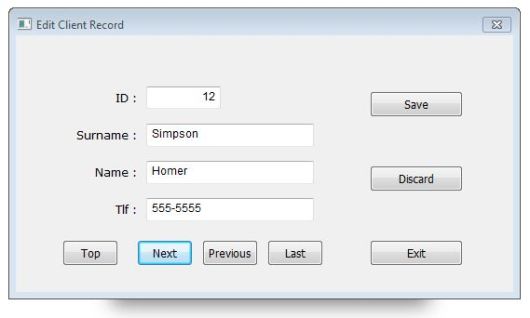
We need seven buttons: Go Top, Go Next, Go Previous, Go Last, Save, Discard, Exit.
Name: btnGoTop, Caption : Top, Col : 50, Row: 220, Height: 28, Width: 60
Name: btnGoNext, Caption : Next, Col : 130, Row: 220, Height: 28, Width: 60
Name: btnPrevious, Caption : Previous, Col : 200, Row: 220, Height: 28, Width: 60
Name: btnGoLast, Caption : Last, Col : 270, Row: 220, Height: 28, Width: 60
Name: btnSave Caption : Save, Col : 380, Row: 60, Height: 28, Width: 100
Name: btnDiscard, Caption : Discard, Col : 380, Row: 140, Height: 28, Width: 100
Name: btnExit, Caption : Exit, Col : 380, Row: 220, Height: 28, Width: 100
Common: Font Name: Tahoma, Font Size: 9
Actions :
btnGoTop: ( DBGOTOP(), ReadData() )
btnGoNext: ( DBSKIP(), ReadData() )
btnPrevious: ( DBSKIP( -1 ), ReadData() )
btnGoLast: ( DBGOBOTTOM(), ReadData() )
btnSave: SaveData()
btnDiscard: ReadData()
btnExit: ThisWindow.Release
Note that actions of four first buttons include two actions, separated by comma and enclosed by parenthesis. With this notation we can define more than one action together.
SaveData() is the inverse of ReadData(): copy values of text boxes to table fields.
PROCEDURE SaveData() // Save data from text boxes to table
CLIENTS->CLI_ID := EditReco.txbCLI_ID.Value
CLIENTS->CLI_SNAM := EditReco.txbCLI_SNAM.Value
CLIENTS->CLI_NAME := EditReco.txbCLI_NAME.Value
CLIENTS->CLI_TLF := EditReco.txbCLI_TLF.Value
RETURN // SaveData()
Discard is simply re-reading data from table.
The result:
To be continued …
Basic Controls – 1
( Image, Label and Button )
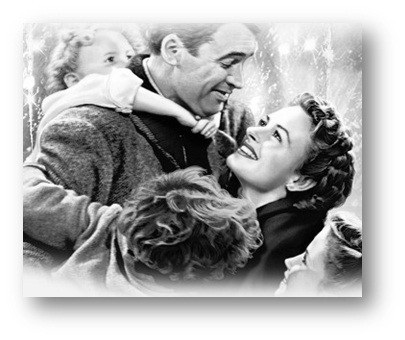
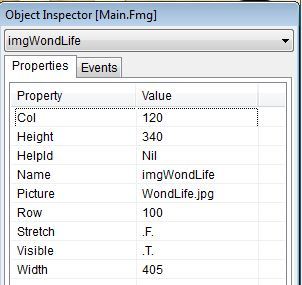
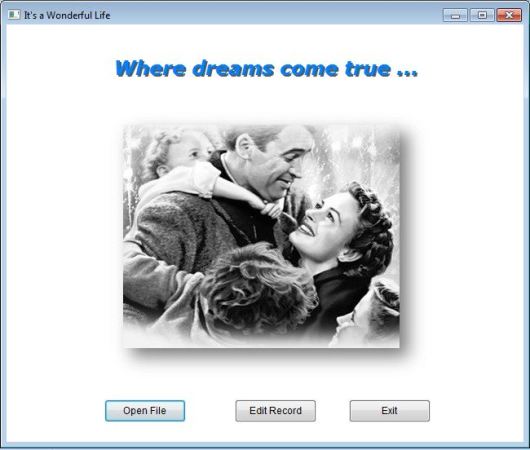
We are continuing with Viva_HMG.hbp, Main.prg and Main.fmg. First, let’s enlarge our form: width: 650, height: 550; and then place an image: First click “image” button the toolbar of HMG-IDE, and then click anywhere in the form. This clicked point in the form, will be left upper corner of control; in this case : image. IDE always first places controls with its default values. Our image is 405 x 340 pixel size:
We need assign a size to image control so it can hold properly our image. We can manually set these values and assign name of image file:
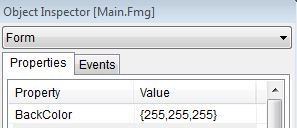
Background color of our form didn’t well-matched with this image. Let’s change it to white:
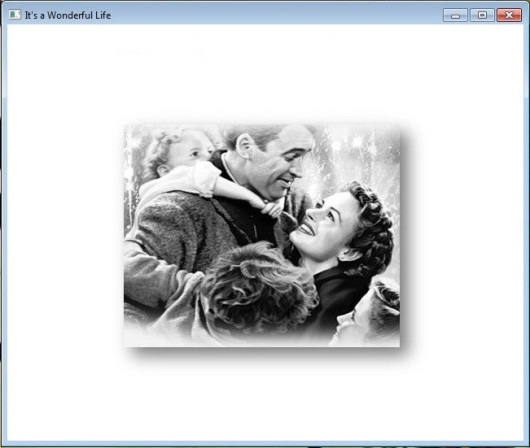
In this step, if we run the program we will see like this :
The STRETCH option of IMAGE control allows assigning size values to the control other than original image sizes. In this case quality of image may decrease. We need also avoiding distortion too; that is keeping fixed aspect ratio of image.
By assigning same width / height values of form and image; we can use an image as back-ground image of form. But in this case we can’t place other control onto image: because controls must not be overlap to each other. Under certain circumstances system not obstructs this. But the beneath control can’t seen.
The LABEL control is an exception of this rule by TRANSPARENT option. If a label is transparent, the beneath control may be seen partially.
Let’s add a label to our form:
The big “A” symbol in the toolbar of IDE represent LABEL. First click this button and then top of our form:
The placeholder of LABEL is primitive situation for now. We have added a new and adjusted both to our needs:
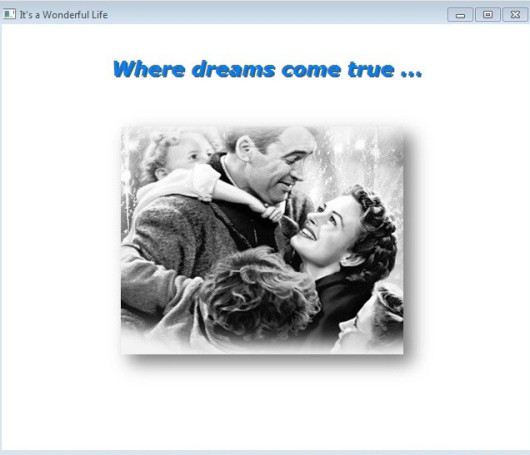
If we built and run our project after set these values, appearance will be like this:
Since two controls (labels) have been overlapped, constructing this “shadow” effect will be a few painful. You can edit .fmg file out of HMG, via any text editor when necessary.
Labels probably are most used controls in GUI programming. This control simply displays any text onto form. For xBase programmers we can say this is GUI counterpart of @ …,… SAY command. As all other GUI controls, we use coordinate system to indicate placement of control. In addition we can set size ( width, height ), back and fore color values, font properties and others as well as we need.
Labels also have ALIGNEMENT property with LEFT, RIGHT and CENTER option. In this sample used LEFT.
In addition, LABEL control supports ACTION event too. This means you can instruct a LABEL control to do an action when user clicked it; same as BUTTON.
Last control to use in this sample is button.
Beside menus, buttons are handy controls for doing an action when user clicked. Let’s see how :
The button for BUTTON in the IDE Tool Bar is this:
As precedents, one click to this button and another one to form, under image:
And two more :
Now we can tailor these buttons to our needs:
First let’s change names and captions given by IDE:
btnOpenFile, btnEditRec and btnExit to names and Open File, Edit Record and Exit to captions, consecutively:
It’s time to assign ACTIONs to this buttons.
MsgInfo( “Open File”) to ACTION of btnOpenFile
MsgInfo( “Edit Record”) to ACTION of , btnEditRec,
ThisWindow.Release to ACTION of btnExit.
And, RUN of course …
Test ACTIONs of buttons by clicking: first two will repeat the sentences in their captions via MsgInfo() function and the last will terminate program. Yes, we are using RELEASE method to the main window for terminate running program, instead of QUIT or CANCEL commands.
That’s all for now !
Working with IDE
Since HMG-IDE is an Integrated Development Environment, it’s possible building an entire project from scratch under HMG-IDE.
But this doesn’t mean “without coding”.
So, we can develop all GUI necessities of our project via HMG-IDE; but what, always we will need some little coding.
Then we can begin our project by building a project file. This is the very first and the easiest step:
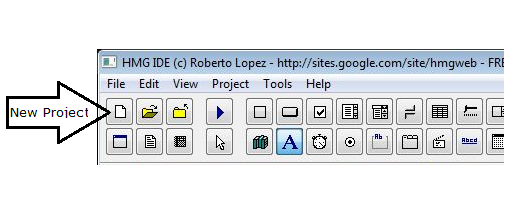
Simply run IDE.exe and then select “New Project”.
When IDE ask, select (or build a new) a working folder and give a name (say Viva_HMG) to the project. .hbp extension will be assigned by IDE to project file.
Whenever IDE build a new project, automatically build and open a module file with name Main.prg and a form file with name Main.fmg.
Module file open by your text editor and form file open by IDE itself.
The content of your module file will be like this :
#include <hmg.ch>
Function Main
        Load Window Main
        Main.Center
        Main.Activate
Return
Basic rules :
– Every HMG project have one ( and only one ) “MAIN” procedure / function
– For using GUI controls, every HMG project have one ( and only one ) “MAIN” form.
So, names of both module and form files are “Main“.
File names doesn’t mandatory;
– only name of first procedure / function of first module file must be “Main” and
– “Window Type” property of one form must be “MAIN“.
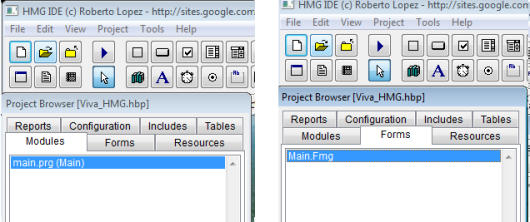
You can see “module” tab of Project Browser window “(Main)” sign adjacent to the Main.prg and at the bottom line of “Properties” tab of Object Inspector “Window Type” property of “Main” form already set “MAIN” by IDE.
Now, we can work on our first form.
First we can give a name to it.
But what happening?
There isn’t “Name” in the properties list of our form !
Yes, this is correct; because:
– Basic rule 3: Every HMG form has their own name. Only exception is: a form to be LOAD, has a unchangeable name: TEMPLATE.
In other hand, you give an “alias” to a loaded form. The way of this is using “AS” close in the LOAD command. FE:
Load Window Main AS frmIDEBS_01
In this case you have change “Center” and “Activate” commands too :
frmIDEBS_01.Center
frmIDEBS_01.Activate
If you don’t use an “alias” in that way, you will use in all references of form by its file name; in this example : “Main”.
Now, its time to give a “Title” to the form.
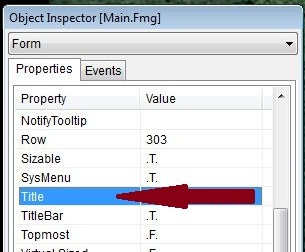
For this, we will use “TITLE” property of form:
Double click “Title” and give a title in the open Input Box, say “It’s a Wonderful Life”
We can change easily background color of form:
Double click BackColor in the properties list.
Click “Custom“.
In the Color Select Form select your favorite background color or simply enter these tree values. : 64, 220, 210
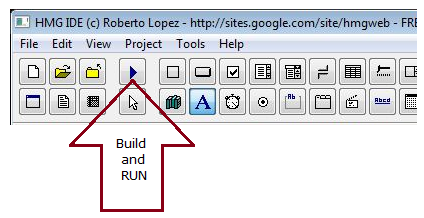
Press RUN button and look to your application in work.
