Basic Controls – 3

( Status Bar, Check Box )

We are continuing with Viva_HMG.hbp, Main.prg and Main.fmg.

While using a table and while navigating between its records, we need some extra info to show to user: Name of table, current record and record count in the table. So user always feels comfortable by knowing where is he / she; which table, which record?

The status bar control is convenient for this purpose and though this is a quite simple control, IDE has a builder for it: Status bar builder.

When you choose this builder ( after open the .fmg file by IDE of course ), a dialog box will open:

By using this dialog box we can define a status bar. We can prefer define status bar manually too:

    DEFINE STATUSBAR FONT "Tahoma" SIZE 9
        STATUSITEM "" WIDTH 300
        STATUSITEM "" WIDTH 40
        DATE         WIDTH 90
        CLOCK             WIDTH 90
    END STATUSBAR

After define status bar, we need assign values to its items. We don’t need assign values to DATE and CLOCK items, because these items will be updated by system (HMG) automatically.

First a little procedure :

PROCEDURE InitEdit()

EditReco.StatusBar.Item( 1 ) := cTableFNam

ReadData()

RETURN // InitEdit()

Change ON INIT event of  EditReco form from ReadData() to InitEdit(.

And add this line at end of ReadData() procedure.

 EditReco.StatusBar.Item( 2 ) := LTRIM( STR( RECN() ) ) + "\" + ;
                                 LTRIM( STR( LASTREC() ) )

Let’s look at the result :

Whenever active record change, Item( 2 ) of Status Bar will be updated ( 5/25 ) in above picture.

In this step, user must use “Save” button every time current record edited.  Whereas “Read” process is different; whenever current record changed, values of text boxes automatically updated. What about automatic save? May be, we can do this; but user may don’t want such automation. Asking a question like “Do you want save?” every change doesn’t a good way.

The better way may be: put a control to form such “Auto save” with On / Off option.

Yes, fortunately we have such control: Check Box.

We can replace a Check Box control to EditReco form with chbAutoSave name and Auto Save caption:

Now, how we will implement Auto Save process?.

By adding a little IF clause to ACTION events of navigation buttons:

Top : (IF(EditReco. chbAutoSave.Value , SaveData(), ), DBGOTOP(), ReadData() )

Next : (IF(EditReco. chbAutoSave.Value , SaveData(), ), DBSKIP(), ReadData() )

Previous : ( IF(EditReco. chbAutoSave.Value , SaveData(), ), DBSKIP( -1 ), ReadData() )

Last : (IF(EditReco. chbAutoSave.Value , SaveData(), ), DBGOBOTTOM(), ReadData() )

To be continued …

Download source files

Basic Controls – 1

( Image, Label and Button )

We are continuing with Viva_HMG.hbp, Main.prg and Main.fmg. First, let’s enlarge our form: width: 650, height: 550; and then place an image: First click “image” button the toolbar of HMG-IDE, and then click anywhere in the form. This clicked point in the form, will be left upper corner of control; in this case : image. IDE always first places controls with its default values. Our image is 405 x 340 pixel size:

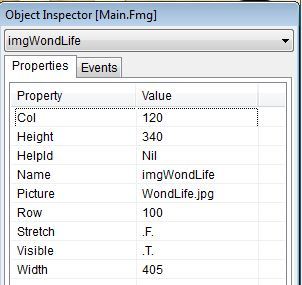
We need assign a size to image control so it can hold properly our image. We can manually set these values and assign name of image file:

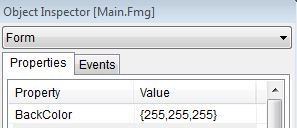
Background color of our form didn’t well-matched with this image. Let’s change it to white:

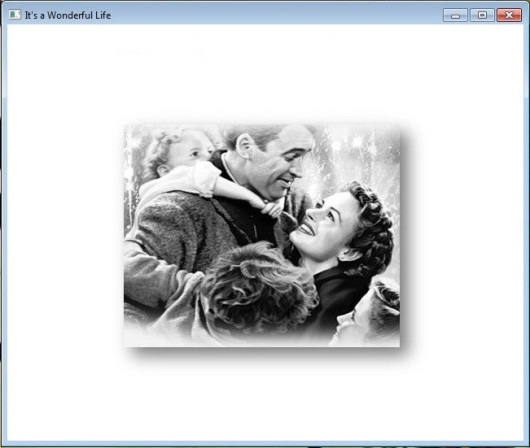
In this step, if we run the program we will see like this :

The STRETCH option of IMAGE control allows assigning size values to the control other than original image sizes. In this case quality of image may decrease. We need also avoiding distortion too; that is keeping fixed aspect ratio of image.

By assigning same width / height values of form and image; we can use an image as back-ground image of form. But in this case we can’t place other control onto image: because controls must not be overlap to each other. Under certain circumstances system not obstructs this. But the beneath control can’t seen.

The LABEL control is an exception of this rule by TRANSPARENT option. If a label is transparent, the beneath control may be seen partially.

Let’s add a label to our form:

The big “A” symbol in the toolbar of IDE represent LABEL. First click this button and then top of our form:

The placeholder of LABEL is primitive situation for now. We have added a new and adjusted  both to our needs:


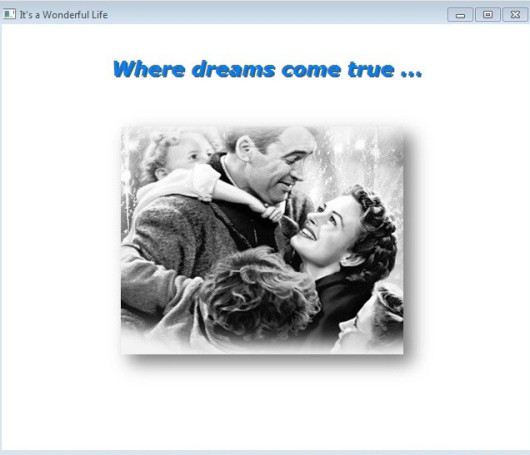
If we built and run our project after set these values, appearance will be like this:

Since two controls (labels) have been overlapped, constructing this “shadow” effect will be a few painful. You can edit .fmg file out of HMG, via any text editor when necessary.

Labels probably are most used controls in GUI programming. This control simply displays any text onto form. For xBase programmers we can say this is GUI counterpart of @ …,… SAY command. As all other GUI controls, we use coordinate system to indicate placement of control. In addition we can set size ( width, height ), back and fore color values, font properties and others as well as we need.

Labels also have ALIGNEMENT property with LEFT, RIGHT and CENTER option. In this sample used LEFT.

In addition, LABEL control supports ACTION event too. This means you can instruct a LABEL control to do an action when user clicked it; same as BUTTON.

Last control to use in this sample is button.

Beside menus, buttons are handy controls for doing an action when user clicked. Let’s see how :

The button for BUTTON in the IDE Tool Bar is this:

As precedents, one click to this button and another one to form, under image:

And two more :

Now we can tailor these buttons to our needs:

First let’s change names and captions given by IDE:

btnOpenFile, btnEditRec and btnExit to names and Open File, Edit Record and Exit to captions, consecutively:

It’s time to assign ACTIONs to this buttons.

MsgInfo( “Open File”) to ACTION of btnOpenFile

MsgInfo( “Edit Record”) to ACTION of , btnEditRec,

ThisWindow.Release to ACTION of btnExit.

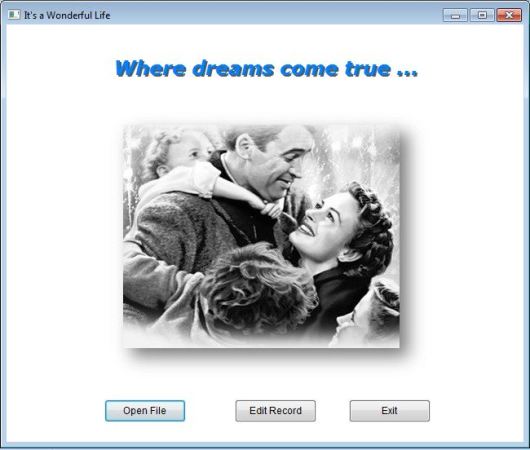
And, RUN of course …

Test ACTIONs of buttons by clicking: first two will repeat the sentences in their captions via MsgInfo() function  and the last will terminate program. Yes, we are using RELEASE method to the main window for terminate running program, instead of QUIT or CANCEL commands.

That’s all for now !

Downloads source files

DBA : Data Base Assistant

DBA is an imitiative work to the © dBASE III’s Assistant.

It may be an easy tool for people who are familiar to this base architecture of the whole x-Base family.

Many thanks to :

Antonio Linares ( Initiator and first developer of © Harbour ) and

“Le Roy” Roberto Lopez ( Initiator, Builder and Developer of © HMG  ).

Without this two big men and their volonteer coworkers, DBA ( and many others of course) couldn’t be exist.

Download ( setup executable ) here.

How I can migrate ?

How I can migrate DOS  to Windows ?

By principle, Harbour  can compile every Clipper Language program; and Harbour applications can run under Windows ( besides many other platforms ) with no problem. This is one of main goals of Harbour project.

Furthermore, Harbour compiled executables will be 32 bit, not 16 😉

Maybe your application include many ( or too many ) .prg file; no problem; (almost) no modification required on your source code; nor extra scripts for compile. ( Thanks to Viktor Szakáts for really wonderful MAKE utility : HBMK2. )

Only  care is :  if “main” prg of your application doesn’t have a “main” module , add one PROCEDURE or  FUNCTION statement to most top of your “main” .prg.

PROC MAIN

That’s all 🙂

You can build your application via HMG by a .bat file (or direct command in the DOS box) such as :

CALL C:\hmg\build.bat /c <mainPrgName>

or via Harbour:

SET PATH=C:\harbour\bin;C:\hmg\mingw\bin;%PATH%
hbmk2 <mainPrgName> -RUN

or the simplest way :

    C:\harbour\bin hbmk2 <mainPrgName> -RUN

( hbmk2 will find all necessary  paths / files 🙂 )

Of course, you need supply name of your main .prg file in place of <mainPrgName>. You may also want to  change  “C:\hmg” and “C:\hmg\harbour” according to your install configuration.

Please be careful about PATH command : If you call the the .bat file from Windows explorer, no problem. If you are working on command (DOS) box, calling repetitively .bat file may cause problem by grown of PATH . In this case you may build a separate .bat for only PATH command and call it only once at beginning of DOS session.

If you want convert a text (console) based application to GUI ( Graphical User Interface ) based Windows application, this is another thing and there isn’t any automatic way for this.  You have need first a GUI library can be used into Harbour. After selecting which library is convenient to your needs and learning  this library, you may begin planing steps of converting process. Writing your application from scratch may be longest but most secure way.

There are links to some articles  about migration in the Links page; looking at this will be useful.

Build a Harbour application

How I can build a Harbour applications ?

Method 1 : By batch processing:

First you have two path definition: harbour\bin and mingw\bin

If  HMG installed in your PC, harbour and mingw directories are already exists. If your HMG root <dir> is c:\hmg, harbour\bin is :

C:\hmg\HARBOUR\bin

and your mingw\bin is

C:\hmg\MINGW\bin

If  HMG not installed or you want use other than HMG folders, you will change paths definitions according to your choice.

Than for this path definitions you will enter (preferably by a  a .bat file ) a command like this:

SET PATH=c:\hmg\HARBOUR\bin;c:\hmg\MINGW\bin;%PATH%

After run this batch file, it’s sufficient a single command for build your application ( in your working directory including <MyProg> of course ):

hbmk2 <MyProg>

hbmk is probably ultimate utility in make area; extremely versatile and extremely successful.

By command window (after changing current directory to harbour\bin or setting path as mentioned below) enter

hbmk2

(without any more world) for short help and

hbmk2 -help

for long one.

More detailed help may find in Harbour Project users’ mailing list.

Method 2 : By hbIDE

( With words of author, Pritbal Bedi) hbIDE, as the name implies, Harbour’s Integrated Development Environment, is an open-source, multi-platform, project. hbIDE is aimed at simplifying the process of project life-cycle comprising, setting-up the project components, editing the sources, building them to final binaries.

You may find more info on hbIDE  herehere and  project home page.

Building Harbour / HMG

How I can build Harbour and / or HMG?

Harbour and HMG both are open source project and it’s possible to (re)build them in your own machine.

But before we need find an answer to the question “why?”.  Both projects has their own binary ( executables, libs, etc ), even setup prg. If you want play on source code, surely you will find building method(s) by digging package.

Making some change in the source code may be educative, useful for understand more deeply the system; but sometime may be also  annoying.

First changing system source files will be risky in general; while changing some place, will be problematic other places, and at least you have make same change repeatedly for every next release of compiler / library.

And second, you have re-build compiler /  library for every change you made.

There is a mymake.bat and win-mak.exe in Harbour package and HMG has buildlib.bat .

And, an excellent tutorial How to build HARBOUR … by an excellent Harbour fan: Giovanni Di Maria.

Anyway, since primary goal is address to beginners, details of this issue is out of scope of this blog.

Browse by IDE

BROWSE is a control a few complicated than others. However HMG-IDE successfully support it.

In this sample we will build a Browse based application in a few steps using HMG-IDE.

Step – 1 : Make a folder for this sample.

Step – 2 : Copy TEST.DBF and TEST.DBT from \hmg\SAMPLES\TUTORIAL folder to your new folder.

Step – 3 : Run HMG-IDE and chose “New Project”.

IDE will ask you location and name for the new project; denote the folder you had build in the first step and give a name, say “IDEBrowse”.

IDE will build a new main module named “Main.Prg” and a new main form named “Main.fmg”

Step – 4 :

Double click “Main.prg” in the “Modules” tab of “Project Browser” window for editing this “main” module:

IDE send this module (.prg) file to your programing editor.

You will see your main program written by IDE :

#include <hmg.ch>

Function Main
 Load Window Main
 Main.Center
 Main.Activate
Return

Step – 5 :

Since BROWSE is a table based control, we must have a table and files opening/closing routines; these aren’t duties of IDE.

So add this two little procedures to the main.prg for opening and closing table:

Procedure OpenTables()
Use Test Shared
Return
Procedure CloseTables()
Use
Return


 Step – 6 :

Now, it’s time for making some arrangements on the form:

Title :

– Click  “Object Inspector [Main.Fmg]\Form\Properties\Title” :


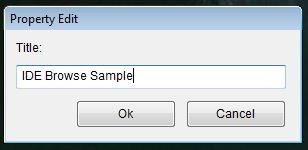
– Give a “Title”, say “IDE Browse Sample” to form :


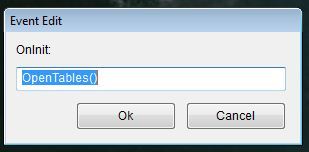
On Init Procedure :

– By clicking “Object Inspector [Main.Fmg]\Form\Events\OnInit” ;


– Assign OpenTables() procedure name to this event:

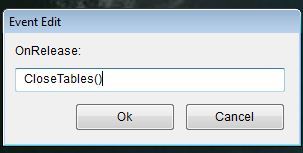
On Release Procedure :

– By clicking “Object Inspector [Main.Fmg]\Form\Events\OnRelease”;

– Assign CloseTables() procedure name to this event:

Step – 7 :

Now, we can place BROWSE control in our form:

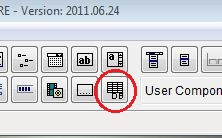
– Click BROWSE button in the Toolbox:

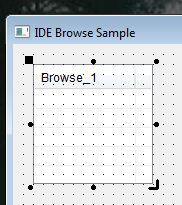
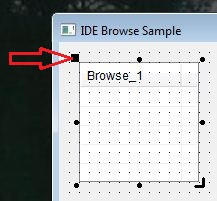
– Then click anywhere in the form :

– Re-size control by dragging “resize” mark at the lower rigth corner :


 – If required, change placement of control by using “replace” mark ( at the upper-left corner )


– By using these two marks, you can place control in the form whatever you like:


 Step – 8 :

And now, we will make some arrangements on the BROWSE control :

After activating ( by clicking on it ) BROWSE control;

By selecting “Object Inspector[Main.Fmg]\Browse_1\Properties” give these properties to Browse_1 control:

– “Fields” property :

{‘Test->Code’,’Test->First’,’Test->Last’,’Test->Birth’,’Test->Married’,’Test->Bio’}

– “Headers” property :

{ ‘Code’, ‘First Name’, ‘Last Name’, ‘Birth Date’, ‘Married’, ‘Biography’ }

– “Widths” property :

{ 150, 150, 150, 150, 150, 150 }

– “Work Area” property :

Test

Note that “array” properties requires open and close curly-braces (‘{}’),  character properties doesn’t requires quotation marks (“”).

.
If you want allow editing  abilities to user, you have change default values (.F.) of these properties to .T.

 ALLOWEDIT
 ALLOWAPPEND
 ALLOWDELETE
 

Last Step :

That is All !

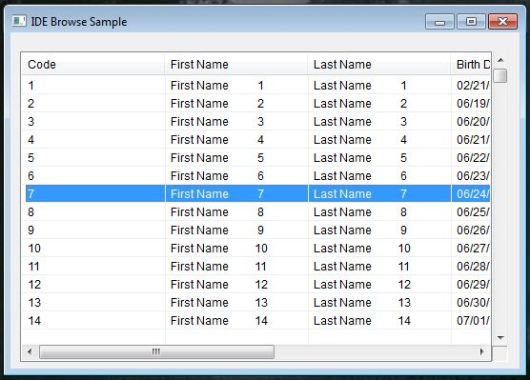
Click “Run” button ( or select “Run” from Project menu or simply press F5 key) for see results :


You have now a BROWSE based HMG application generated  by IDE.

When you use “Run” command or attempt to closing   your form by clicking “X” button, IDE ask you saving it ( if any change you have made ). You may also use Project\Save Form menu command.

Since IDE is a “Two-Way Form Designer”, you can edit .fmg files by double clicking its name in the “Forms” tab   of “Project Browser” window.

And since .fmg files are pure HMG source code, you can open a .fmg file by your editor to see  form source  code generated by IDE. Inspecting this code may be useful for better understanding and learning HMG.

You can also edit this file manually, but under your own risk ! Some modifications may not suitable to the standards of Form Designer.

Quick Start to HMG

Building a HMG project in a few steps:

Please refer to the HMG-IDE page when needed.

Step 1 :

Download latest release of HMG package and  run HMG setup wizard. You can change default location and name of HMG; and your HMG directory structure will be like this:

Note : This structure is for HMG 3.0.39; later may change.

Attention to the HARBOUR and MINGW folders. This means that you haven’t download or install neither Harbour nor MinGW. HMG setup wizard include its for your convenience.

Attention also IDE directory.  HMG-IDE also included into package; you haven’t any more download process for it.

Step 2:

Run HMG-IDE.

Step 3:

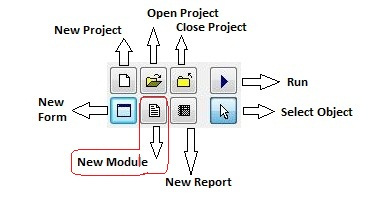
Select  File\New Project from menu or simply click New Project button.

Select ( make one new if necessary ) a folder and give a name your first project, say “HelloWord”. You  may use long file name; but beware including spaces and special character in your full file name.

You will see your project name ( with .hbp extension) in title of Project Browser window.

Whenever you start a new project, IDE builds a “Main.prg” and a “Main.fmg” for you and open automatically:

#include <hmg.ch>

Function Main

Load Window Main

Main.Center

Main.Activate

Return

You may continue working with these two main files. For following a sample/tutor it’s not mandatory using file (project, module, form ) names exactly. F.e. you can apply “HelloWord” sample by using “Main.prg” instead of “HelloWord.prg”.

If your project does not include a form ( .fmg file ) simply exclude default main form (“main.fmg” ) by using “Project\ Delete File” menu command. In this case you have delete Load, Center and Activate form command lines in the “Main.Prg”.

Caution : Use carefully “Delete File”; it’s not only “Exclude from project”, also delete selected file from disk.

If you prefer using module/file name in the sample or your own, you may exclude (delete) main module ( “Main.prg” ) too.

Step 4:

If  you prefer construct  your own module, select Project\New Module from menu or simply click “New Module” button.

Give a name for your first module ( .prg ) file; say again “HelloWord”. You can easliy see that IDE  give .prg extension your module file name and if it is first module of your project, will set and marks it as “(Main)”. Afterwards you can easliy change your main module by selecting any of your  modules and then selecting “Project\Set Module As Main” from menu. Every project must have one and only one main module.

Step 5:

Double click on your module name in the project browser. This will open your module file for editing. HMG has a default source code editor defined. You can change default module editor in “Preference” page by selecting “Tools\Preferences” from menu.

Whenever you open a new module file you will see this line on the top of page:

#include <hmg.ch>

This line is standard first line of all HMG modules. Unless you want build a project for console mode only, this line is necessary.

Step 6:

After this first, enter below lines to your program :

Function Main

DEFINE WINDOW Win_1 ;
AT 0,0 ;
WIDTH 400 ;
HEIGHT 200 ;
TITLE ‘Hello World!’ ;
MAIN

END WINDOW

ACTIVATE WINDOW Win_1

Return

Step 7:

Save your program file and then build and run your project by selecting “Project\Run” from menu or simply click “run” button.

That is all !

Analysis of program :

Function Main statement : Every HMG project must have one and only one “main” function ( or procedure ) and its name must be “main”.

DEFINE WINDOW command: Define  the main window for the program.

Win_1: Is the name of the window.

AT 0,0: Indicates the window position (row=0,column=0)

WIDTH 400: Means that the window will have 400 pixels width.

HEIGHT 200: Means that the window will have 200 pixels height.

TITLE ‘Hello World!‘: Indicates the text in the window title bar.

MAIN: Indicates that we are defining the main application window (a main window is required for all Harbour MiniGUI applications)

ACTIVATE WINDOW Win_1: Will show the window and start the event loop.

Return statement : Indicate the end of function “main”.

About HMG Samples

What is HMG ?

( By Roberto Lopez, builder of HMG )

Well.. for the new people approaching HMG I can say that this is a mix between one of the best programming and data manipulation languages ever created (xBase) and the VB/RapidQ GUI handling style.

All GUI object are public and can be created and managed with very simple code.

The basic components of HMG are:

– Harbour Compiler (generates C code from xBase code).

– Harbour MiniGUI library (functions and preprocessor directives to handle GUI).

– MingW Compiler.

– Harbour MiniGUI IDE (Optional tool for two-way visual design).


What are the main project goals ?

To keep the GUI handling as easy, elegant and clean as possible and the
library core as compact, stable and reliable as we can.

It implies, that the changes to the core will be subject to very strict test
prior tag a specific build as ‘stable’.

Other of the main goals is to hide the complexities associated with the
operating system internals, allowing to the programmer, focus on his
application, instead OS technical things.

So, what is the place for experimentation and exciting new ‘things’ ?

The User components interface, of course.

I’ve created to let to any HMG user to add fully new GUI elements, or add
properties and events to existing ones.

Where is the HMG site ?

http://harbourminigui.googlepages.com

Where can I download HMG ?

http://harbourminigui.googlepages.com

Why Roberto doesn’t answer my messages ? :)

I have a very little free time for HMG right now. Anyway I’m reading
and answering the Sorceforge’s HMG bug tracker and Wish tracker,
almost daily, please use it.

Does HMG will be ‘real’ OOP some day in the future ?

Who knows :)

What about user contributions? 

I’ve noticed about comments like “Roberto does not accept code contributions
anymore“.

This is true, but need some clarification.

In 2005 I’ve decided to change the way I work on minigui.

From that moment I do all modifications to the library personally, but I still receiving comments, suggestions ideas and wishes from the users.

The reason for this, is that I want to keep the control of the code included in the library, to assure that it remains compact, fast, stable, reliable and backwards compatible, keeping and eye on general project goals (enumerated in the previous message).

An example of this, is the recent Activex addition.

I’ve noticed that this feature was incorporated to the Freewin project.

I’ve analyzed the code, learned how it works ant then rewrote it
from the scratch to suit minigui library needs.

This way, I’m not incorporating a ‘black box’ to the library that
could be difficult or impossible to fix or modify. I’m incorporating
code that is simple and easy to maintain.

I can make mistakes and write buggy code (of course) but there is a big possibility that I’m be able to fix it, since I’ve wrote it.

So, You can send to me (to HMG wish tracker at SourceForge) sample code with your propossed addition. I’ll take a look at it.

What about other MiniGUI based projects… ?
Why do not all MiniGUIs guys unite and work together ?

I’ll could add another question:

Why the humanity does not unite and work together? :)

Well… I apreciate and respect a lot to Grigory, Jacek and Janusz from MiniGUI Extended and to Ciro and Vicente from OOHG. All of them are doing a great work, but simply we have different opinions about of what MiniGUI has to be. Thats all.

This is very good for users, since they have three alternatives to choice.

I feel very honored because two new projects emerged from my original work.

Why do not add to library a nice widget that do something… ? it could be good for my application that needs it.

I could write now a long explanation about the need that the features added to the core library must be generic, designed to fill the needs of most common programming situations and not to solve a specific user’s problem.

Fortunately you could get the Simpsons episode 7F16 :)

In this episode Homer designs a car to suit his own needs. Of course, the car was a monstrosity very expensive and (of course) a complete failure.

Perhaps there is no need to watch the episode to get the idea, maybe that this image be enough:

homer-car

If the idea is not clear enough yet, here is a little explanation:

Adding lot of things, designed to suit specific (very unusual situations) to the library core, will give us a fat, slow, buggy and difficult to learn GUI system. I’ll avoid it as much as I can.

Why do you don’t release the HMG IDE source code?
Which are your obscure intentions about it? 

IDE is a very big application. It has about 41000 lines of code.

To make it run faster it relies heavily on MiniGUI library internals and some C code to cover low level things not implemented on the library.

Since it relies on library internals, sometimes, modifications to library, obligate to me to make changes (usually extensive) to IDE code.

IMHO these (and other things) turn this project into a personal one, not suitable to make its code public.

Anyway, I not discard the possibility to make the code public in the future.

I can only assure that IDE will always be FREELY DISTRIBUTED as freeware.

There is no evil intentions behind this decision :)

Maybe there is a problem (not fully specified) with control XXX 
but I’m not sure. Can you fix it please?
My application is not working as expected. I’ve attached to the message all app 5000 lines of code. I guess that must be an HMG problem, please solve it.

Ok. I’ll say once again :)

I cannot analyze a presunct bug based on a tale about it, or read a thousand lines app to attempt to find it. It is very time consuming and inefficient way to go.

Please, send me a simple sample showing the bug, to SourceForge HMG bug tracker. The sample must include all necessary files to compile and run it.

If you are not able to reproduce the problem in a small sample, is highly probable that be not an HMG problem, but a error in your app.

Do you accept donations?

In early 2004, the total suscriptors in all MiniGUI forums was more
than 1500.

I’ve took about three hours a day (sometimes more) to answer all the messages directed to me with help requests.

So, I’ve think that request for donations from the MiniGUI users could be a good idea. It could allow to me, dedicate full time to the project, filling the needs of those using the library to develop professional apps.

Sadly, with the exception of a small group of users, there was no
significant response.

Some time later, I’ve decided to remove donations request from the HMG releases due to the lack of interest from the users.

Based on that experience, I have no plans to do it again.

Regards,

Roberto.

~~~~~~~~~~~~~~~~~~~~~~~~~~~~~~~~~~~~~~~~~~~~~~~~~~~~

Notes :

1. This article dated to 2008, current address of main HMG site is HMG_Forum and here download page. Also look at “Home page” of HMG for latest announces.

2. This article borrowed courtesy of author from HMG_Forum.

3. Do you like HMG ? If so, don’t forget this !